
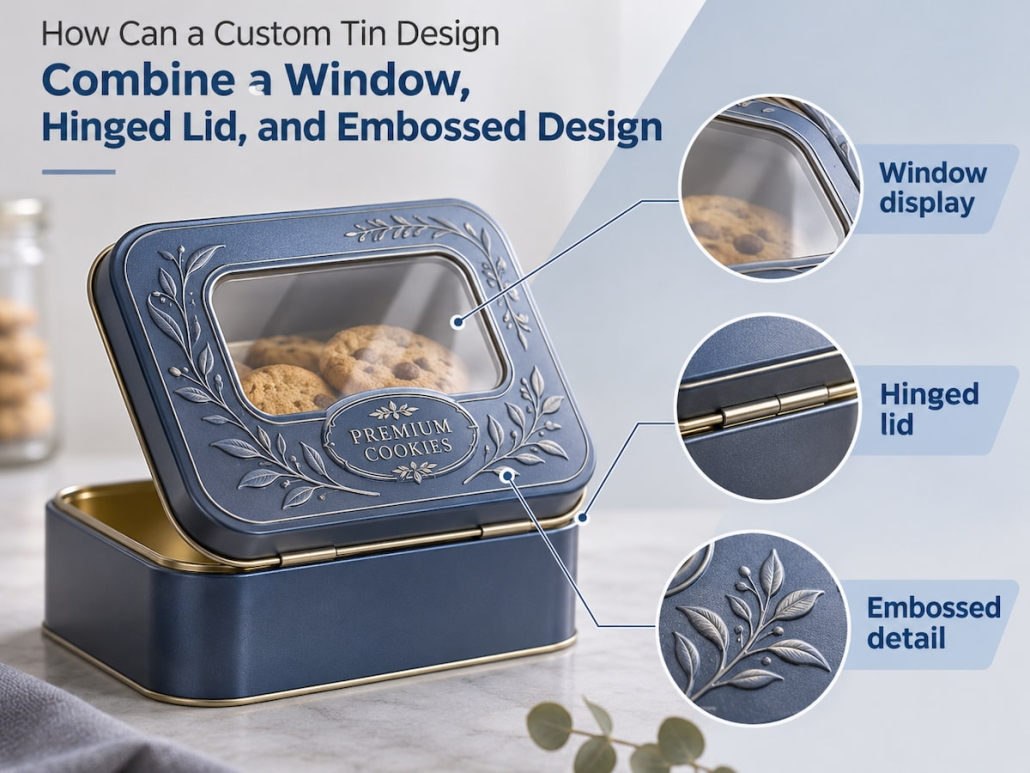
How Can a Custom Tin Design Combine a Window, Hinged Lid, and Embossed Design?
Transparent windows, hinged lids, and embossed logos each serve distinct functions, but integrating them into a single metal can creates several structural design challenges. Creating a window requires removing part of the metal sheet; a hinge subjects the lid’s edges to concentrated stress during repeated opening and closing; and embossing alters the shape of the surrounding tinplate. If the layout of these elements fails to account for their interactions, the tin can may ultimately suffer from panel deformation, coating damage, or lid instability. As a tin can manufacturer, we carefully plan each element’s placement in custom tin design, ensuring essential structural support is maintained, and tooling and production processes are meticulously coordinated before manufacturing begins.
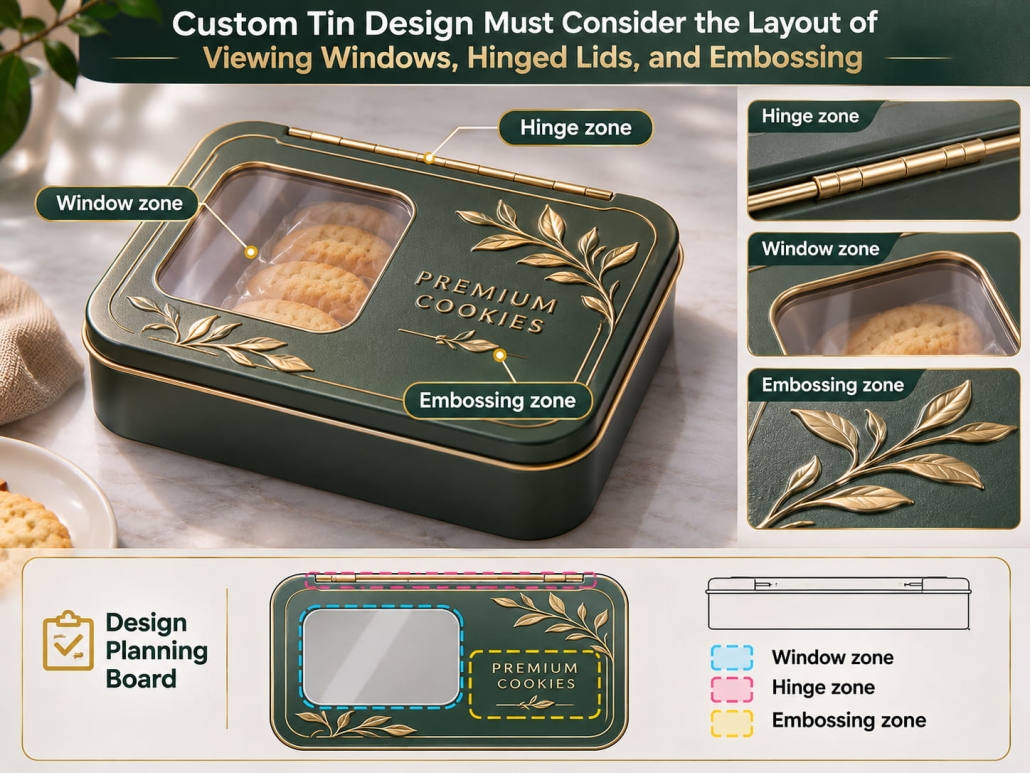
Custom Tin Design Must Consider the Layout of Viewing Windows, Hinged Lids, and Embossing
The main challenge is deciding how to lay out these elements. Viewing windows should generally let customers see the product contents clearly; manufacturers should place hinges along a sturdy opening edge; and designers should apply embossing to sufficiently wide metal surfaces. Manufacturers should plan these areas holistically rather than design them in isolation.
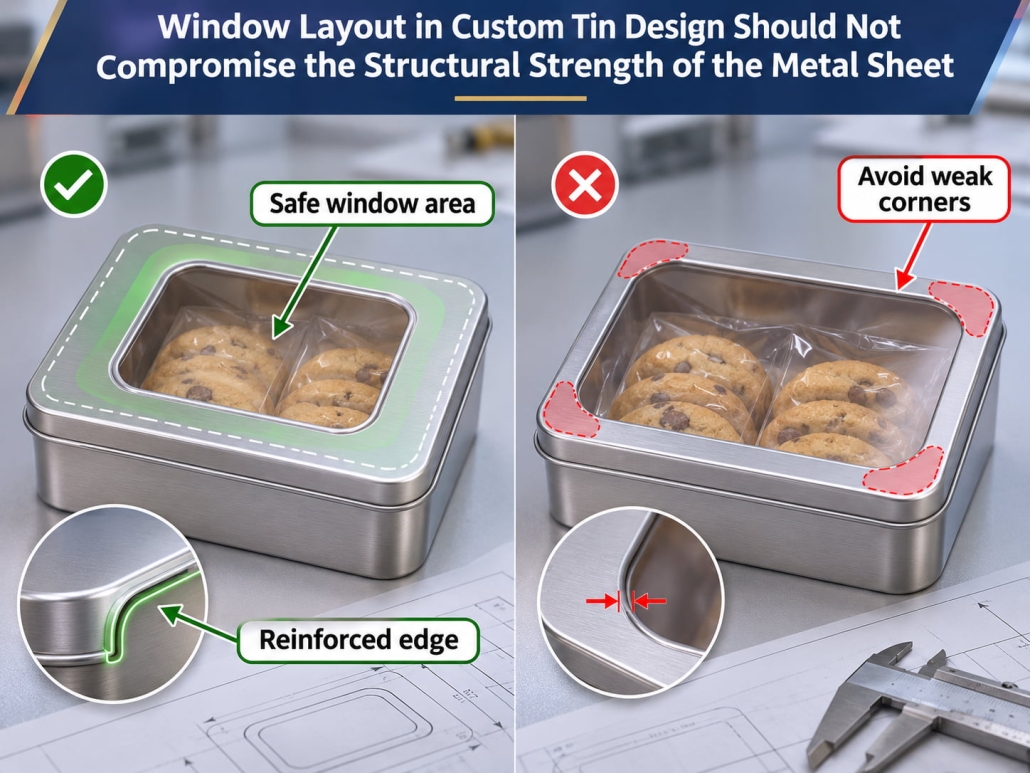
Window Layout in Custom Tin Design Should Not Compromise the Structural Strength of the Metal Sheet
Creating a window involves cutting into the tinplate and embedding a transparent material. While windows showcase the product, they also compromise the metal sheet’s integrity. This is particularly critical if the window is located on the hinged lid. The remaining metal around the window must support the lid’s structure and provide enough surface area to secure the transparent insert.
Therefore, when designing window openings, we comprehensively consider the following three aspects:
- Window Size and Position: The window should ensure the product is clearly visible while avoiding the removal of unnecessary metal sections from the lid.
- Perimeter Support: Retain an appropriately wide metal border around the window to allow edge finishing and secure attachment of the transparent insert.
- Insert compatibility: The selected transparent material and fastening method should suit the packaging’s intended use and meet product-contact compliance requirements.
The window shape also affects the overall design. Rounded corners avoid abrupt geometric structures caused by sharp internal angles, creating smoother transitions around the window that are easier to process.
In this regard, our design philosophy centers on maximizing product visibility while ensuring sufficient metal structure remains around the window to enable reliable assembly and provide necessary structural support.
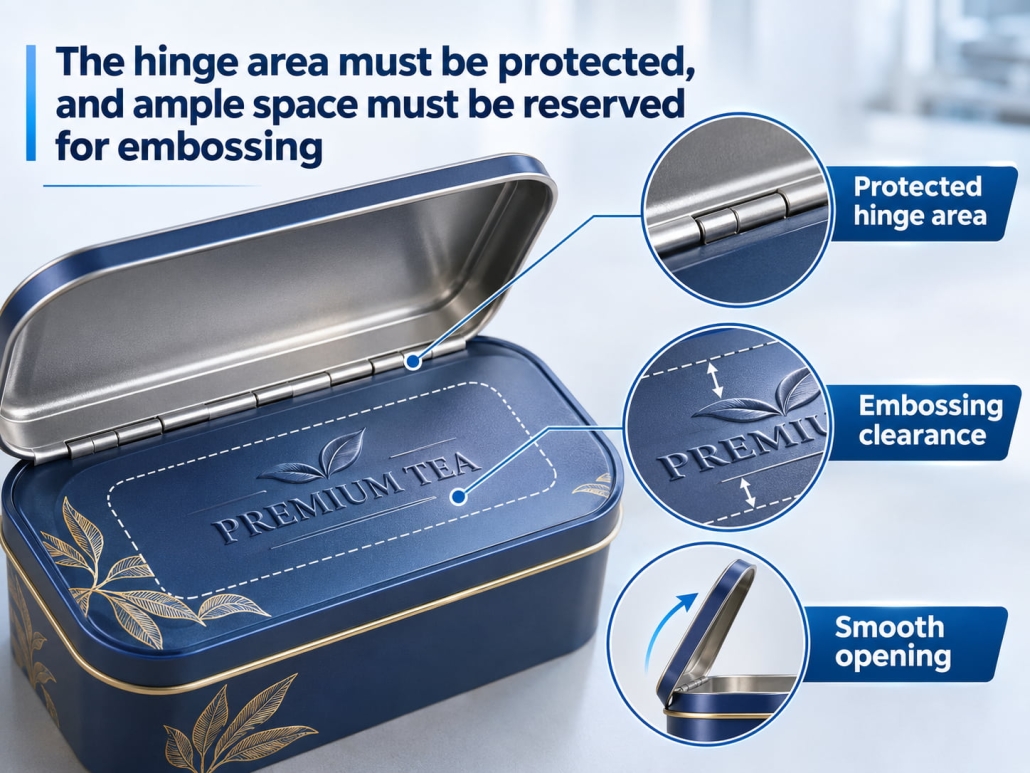
The hinge area must be protected, and ample space must be reserved for embossing
Hinge and embossing designs impose different requirements on the manufacturing process.
Hinges are functional connecting structures that must withstand repeated opening and closing operations. Their connection points require sufficient metal support to ensure precise alignment. Depending on the specific structure, we may use formed hinge tabs, rolled-edge hinges, folded-edge structures, or apply localized reinforcement. If the window opening is too close to the hinge, the remaining metal material may be insufficient to provide a secure connection;
The embossing process involves additional considerations. Embossing causes localized deformation of the tinplate, so designers must coordinate its position and depth with the surrounding panel geometry.
Therefore, we recommend the following design layout:
- Window Area: Maintain a continuous metal border around the opening.
- Hinge Area: Ensure the connection area is sufficiently wide and sturdy, and avoid unnecessary cutouts.
- Embossed areas: Select relatively flat panel surfaces and avoid overlapping with window frames, hinge connections, or major formed edges.
This does not mean that designers must place the embossing at the center of the lid. They can position the brand logo on the side or below the window, as long as the embossed design does not compromise structural strength or assembly requirements.
As a tin can manufacturer, we avoid concentrating multiple structures that require high levels of craftsmanship in a single confined area.
Structural Reinforcement for Custom Tin Design and Planning of Manufacturing Processes
After identifying the three functional areas, the next step is to ensure the tinplate retains its shape during manufacturing and use. Cutouts, hinges, and embossed details should not be treated as decorative elements added after the structure is finalized; their impact must be considered in advance during die design and forming planning.
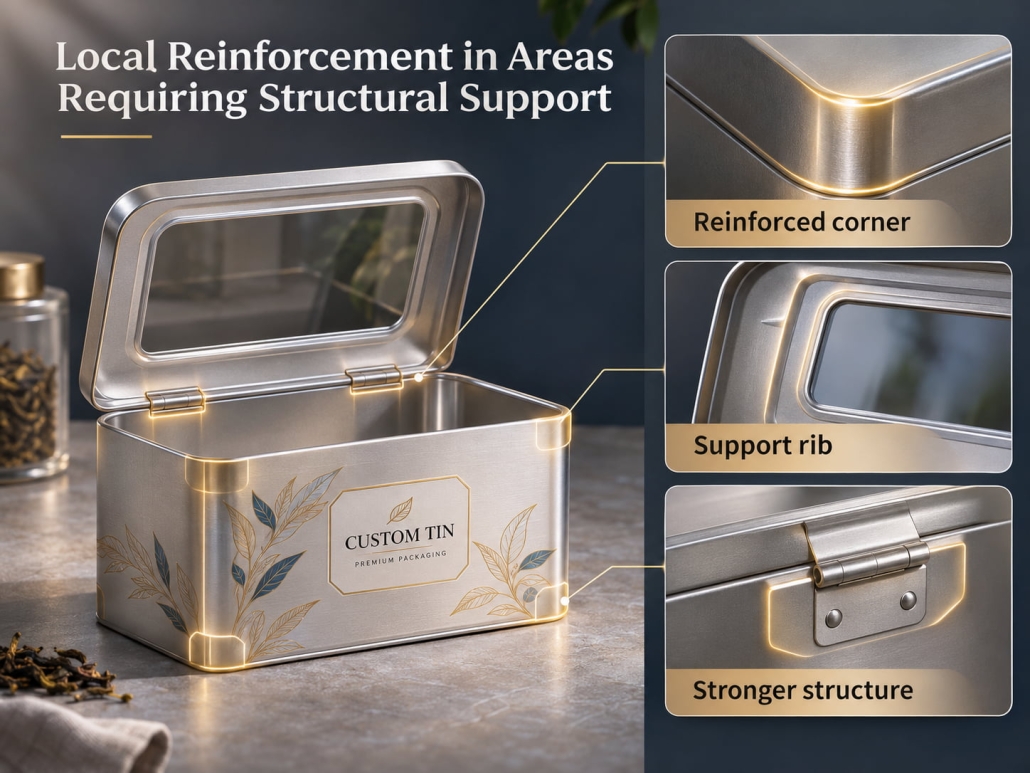
Local Reinforcement in Areas Requiring Structural Support
Not every part of the tin box requires additional reinforcement. Focus on areas where cutting, repeated movement, or metal deformation may compromise structural stability.
For custom tin boxes featuring cutouts and hinges, we believe three areas require special attention:
Around windows: A sufficiently wide metal border or a formed support frame helps maintain panel stability and provides a suitable mounting surface for transparent inserts.
Around hinges: The hinge mounting area should retain enough material and support to withstand repeated opening and closing. Depending on the specific design, consider using flanges, reinforced tabs, or formed edge structures.
Around embossed areas: Control the embossing depth, line width, and transition radii to prevent excessive local deformation. Additionally, the embossed design should not interfere with the window’s mounting frame, hinges, or closure mechanism.
Therefore, when combining embossing with other metal-forming processes, you must fully account for the coating’s flexibility and the forming-process conditions.
Follow Manufacturing Processes That Protect All Features
Even with the best structural design, improper sequencing of manufacturing processes can lead to suboptimal final results. For tin packaging that includes printing, window cutting, hinges, and embossing, TSING evaluates the production sequence based on each feature’s location and the required deformation.
As a tin box manufacturer, our manufacturing process is as follows:
Step 1 — Structural Layout
Determine the tin can dimensions, window locations, hinge positions, embossed logo areas, and closure requirements. Using 2D die-line drawings and 3D structural models, we can identify and resolve potential structural interference issues before die production.
Step 2 — Material and Artwork Preparation
Determine the tinplate thickness, surface treatment process, transparent-insert material, and printing specifications. Artwork layout must be positioned according to the final formed geometry.
Step 3 — Cutting and Embossing
Use validated dies to cut the metal sheet and create window openings. The embossing process can be performed either while the sheet metal is flat or at other appropriate stages during forming, depending on the location of the embossed features.
Step 4 — Forming and Assembly
Produce the lid and body of the tin, refine the window openings, install the transparent inserts at the appropriate stage, and assemble the hinges.
This process is not set in stone; we will adjust it based on the tin’s specific structure.
Validation Through Finished Product Sample Testing
Step 5 — Finished Product Sample Validation
Inspect the alignment and secure attachment of the cutout, the smooth operation of the hinges, the lid fit, the clarity of the embossed patterns, the surface finish, and overall structural stability.
As a tin can manufacturer, our goal is to ensure the cutouts are securely embedded, the hinges open and close smoothly, and the embossed patterns appear as intended—all while ensuring neither the lid nor the tin can body deforms.
To successfully create a custom tin can that integrates a window, a hinged lid, and embossed designs, it is crucial to consider three key aspects: arranging each functional element within a reasonable structural area; reinforcing areas affected by the window or frequent movement; and planning the production process appropriately to ensure the final product’s geometric structure remains intact.
 Facebook
 Twitter
 Linkedin

