How Are Candle Tin Dimensions Controlled During Deep Drawing and Forming

How Are Candle Tin Dimensions Controlled During Deep Drawing and Forming?

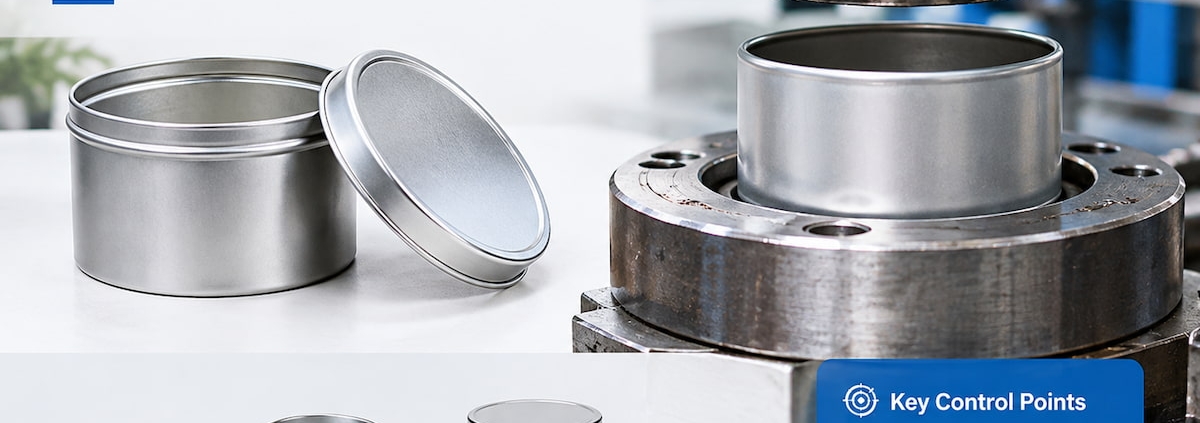
When controlling deep-drawing candle tin dimensions, it is essential to manage material flow from the flat tinplate blank through each forming stage. First, we determine the candle tin’s diameter, height, sidewall profile, bottom geometry, flange dimensions, and lid-fit requirements; next, we translate these specifications into blank dimensions, die geometry, drawing depth, and forming allowances. During pilot production, we measure the formed cans directly rather than relying solely on die dimensions, since factors such as metal flow, springback, sidewall thinning, and bottom deformation can affect the final dimensions. For custom candle tins, TSING uses die control, step-by-step forming, in-process inspection, and finished-product verification to ensure dimensional stability from prototyping to mass production.

Candle Tin Dimensions Must Be Based on the Finished Container

For candle tins manufactured using deep drawing, TSING first identifies which dimensions will affect filling, lid assembly, appearance, and subsequent candle production processes.

Key dimensional control points typically include:

Critical Dimension Manufacturing Importance
Outside diameter Controls lid fit and overall appearance
Internal diameter Determines candle capacity and filling space
Finished height Affects wax volume and package proportion
Rim diameter Influences lid engagement
Bottom flatness Affects stability during filling and display
Wall roundness Prevents uneven lid fit and visual distortion
Bottom corner radius Influences metal flow during drawing

These dimensions must be considered comprehensively.

For example, increasing the inner diameter without considering wall thickness and outer diameter may affect capacity and lid fit. Similarly, changing the height of a custom candle tin may require adjustments to the forming strategy, as a deeper draw depth alters the amount of material required to flow from the blank to the side walls.

At TSING, we first define the finished product’s dimensions, then decide whether to develop new dies or reuse existing ones based on those specifications.

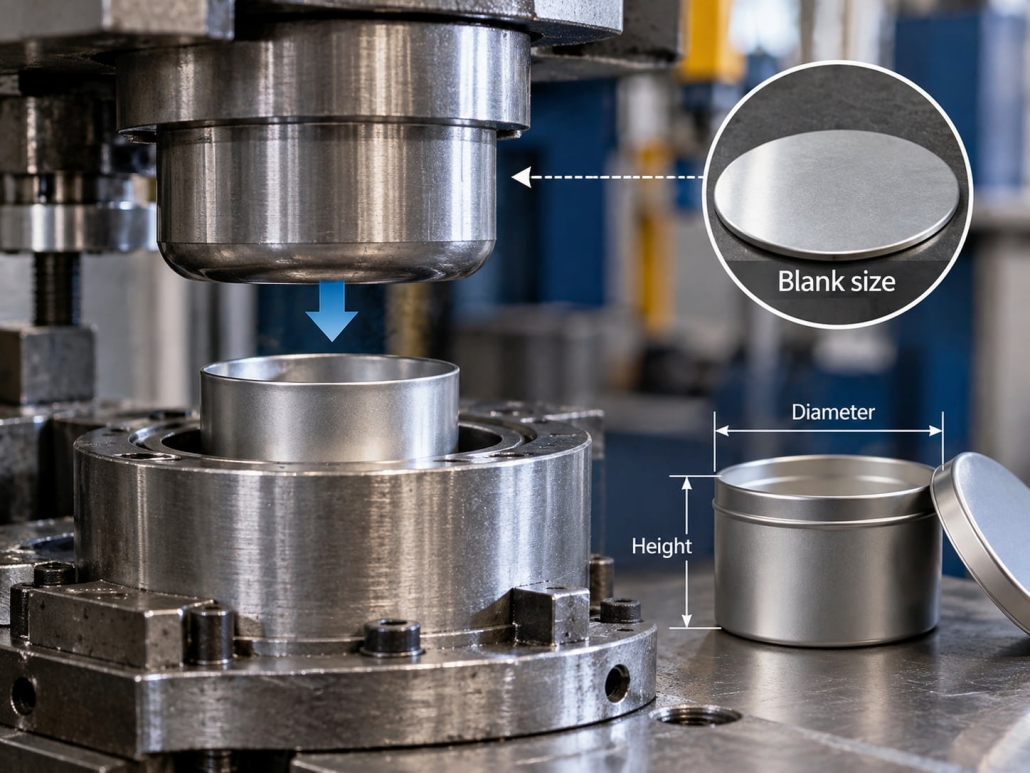
 Candle Tin Dimensions Depend on Blank Size, Die Geometry, and Drawing Depth

When manufacturing candle tins via deep drawing, the process isn’t simply pressing a circular blank into a cavity to achieve the final dimensions. As the punch moves downward, the tinplate in the flange area flows inward to form the container’s vertical side walls. During this process, it is essential to prevent excessive wrinkling, cracking, or uneven wall thickness.

The manufacturing relationship can be summarized as follows:

Finished candle tin dimensions → Blank dimensions → Punch and die geometry → Drawing depth → Material flow → Final formed dimensions

Selecting blank dimensions is critical. If the material is insufficient, the side walls may not reach the required finished height, or excessive stretching may damage them. Conversely, an oversized blank or poor material-flow control can cause rim wrinkles and dimensional inconsistencies. The clearance between the punch and die also affects the forming result. This clearance must match the tinplate thickness and the intended structure to ensure that, as the material flows between the dies, it is neither excessively compressed nor allowed to deform uncontrollably.

For bulk orders of deep drawing candle tins, TSING also determines whether a single deep-drawing operation can achieve the desired shape or whether the process requires multiple forming steps. If the depth-to-diameter ratio is high, material stress increases, which may require a staged forming process to maintain sidewall shape stability.

The core principle is that the die must control the metal’s flow path, rather than simply forcing it into the final shape.
Candle Tin Dimensions Depend on Blank Size, Die Geometry, and Drawing

Continuous Flow of Metal Material Can Cause Changes in Dimensions

One of the main challenges in deep drawing is that metal cannot maintain constant dimensions during forming. The material flows inward, stretches around the bottom fillet, and changes direction as it forms the side walls. After operators remove the workpiece from the die, the material may also spring back slightly.

This leads to several factors that can cause dimensional deviations:

  • Uneven material flow → Deviations in can roundness
  • Excessive tensile stress → Thinning of side walls or inconsistent height
  • Improper flange control → Wrinkling near the top of the side walls
  • Springback → Slight dimensional recovery after forming
  • Bottom deformation → Instability of the finished container when placed

Therefore, TSING evaluates the fit between the rim and the main body of the can, rather than simply measuring a single diameter. Tinplate thickness also affects forming performance. Before finalizing the die, manufacturers must confirm the material specifications for the custom candle tins. Changing the sheet thickness affects forming resistance, side-wall deformation, and how well the finished can body fits the lid.
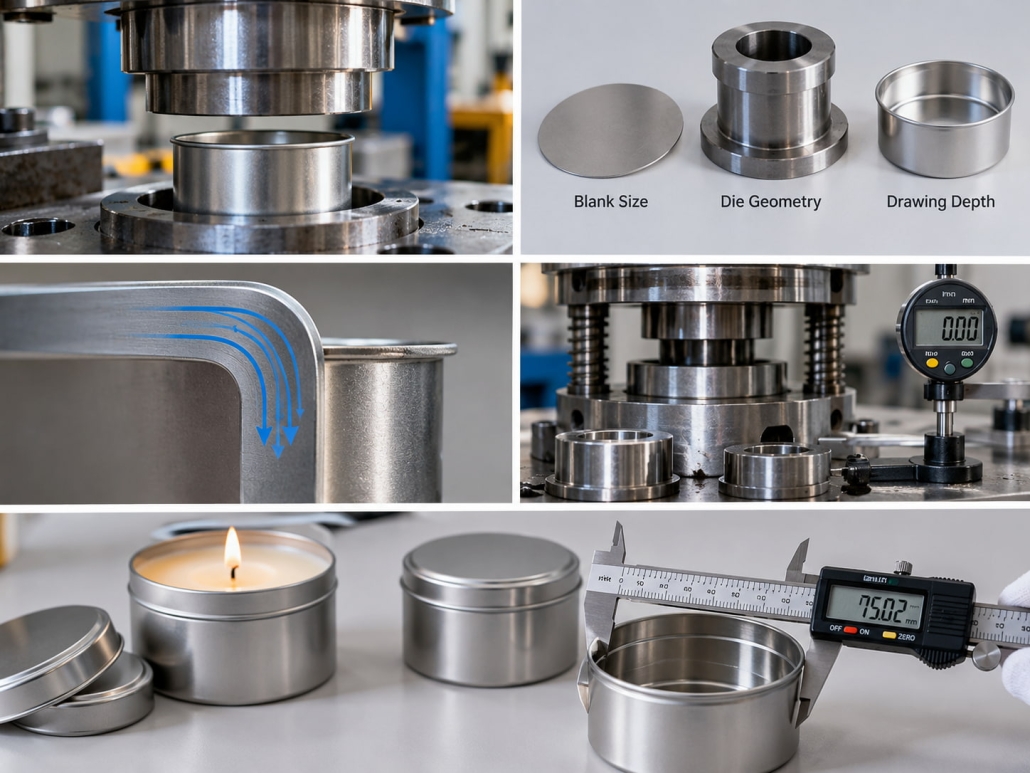
Continuous Flow of Metal Material Can Cause Changes in Dimensions

Ensure dimensional consistency through mold adjustments and process measurements.

During trial production, TSING compares molded samples with established specifications and evaluates the causes of deviations. If finished boxes exhibit issues such as oversize or undersize dimensions, height deviations, insufficient roundness, or unstable bottoms, corrective actions should target the relevant production factors rather than simply changing the inspection standards.

Our standard control process is as follows:

Trial Molding
→ Measure diameter and height
→ Inspect roundness and bottom geometry
→ Test lid fit
→ Identify sources of deviation
→ Adjust the mold or molding process parameters
→ Produce new samples
→ Verify repeatability

Once mass production begins, we monitor key dimensions regularly. Without continuous process monitoring, factors such as mold wear, lubrication conditions, press alignment, and raw material fluctuations can lead to variations in product outcomes. For us, ensuring production consistency (repeatability) when manufacturing large-volume wholesale candle tins is more important than producing a single perfect sample.
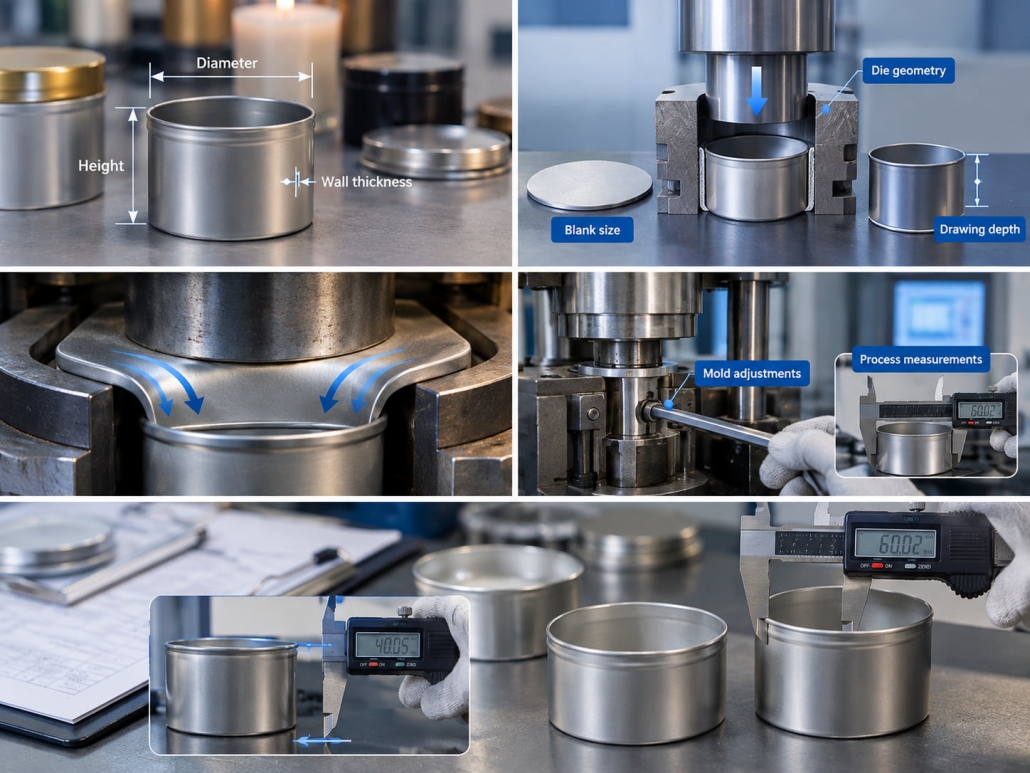
Ensure Dimensional Consistency Through Mold Adjustments and Process Measurements

Verifying Candle Tin Dimensions on Finished Products

The final stage of candle tin dimensional control is functional verification. Even when the candle tin body meets the specified diameter and height, the packaging may still fail inspection if the lid doesn’t fit properly or the container doesn’t sit securely.

Therefore, TSING evaluates finished product samples in three ways.

  1. First, TSING takes dimensional measurements to verify the outer diameter, height, flange dimensions, and other specified control points.
  2. Second, TSING conducts a shape inspection to check roundness, wall-thickness uniformity, bottom flatness, and any visible deformation.
  3. Third, we perform an assembly test to confirm the lid fits consistently with multiple tin bodies (not just a single selected sample).

For candle-filling applications, TSING also evaluates whether the finished containers have the required internal volume and a stable base suitable for downstream filling and handling.

We summarize the complete deep-drawing and forming process control as follows:

Define the final dimensions of the candle tin → Confirm tinplate specifications → Calculate blank dimensions → Design die drawings → Conduct forming trials → Measure formed jar bodies → Correct material flow or die as necessary → Verify lid fit → Monitor critical dimensions during mass production.

Verifying Candle Tin Dimensions on Finished Products

Ensuring Consistent Dimensions for Every Batch of Candle Tins

TSING’s control method considers the required diameter, height, flange geometry, bottom shape, and lid fit from the initial stages of mold design and forming process development. Subsequently, through prototyping and process measurements, the dimensions of the blank, the geometry of the punch and die, draw depth, material flow, springback, roundness, and bottom flatness are verified.

Consequently, for custom candle tins, this becomes a continuous manufacturing process that spans the entire cycle—from drawing development and die adjustment to monitoring mass production. When the tin body maintains consistent dimensions, roundness, bottom stability, and lid fit throughout mass production, it shows that the team has the deep-drawing process under control. This consistency lays the foundation for producing reliable candle tins at scale.
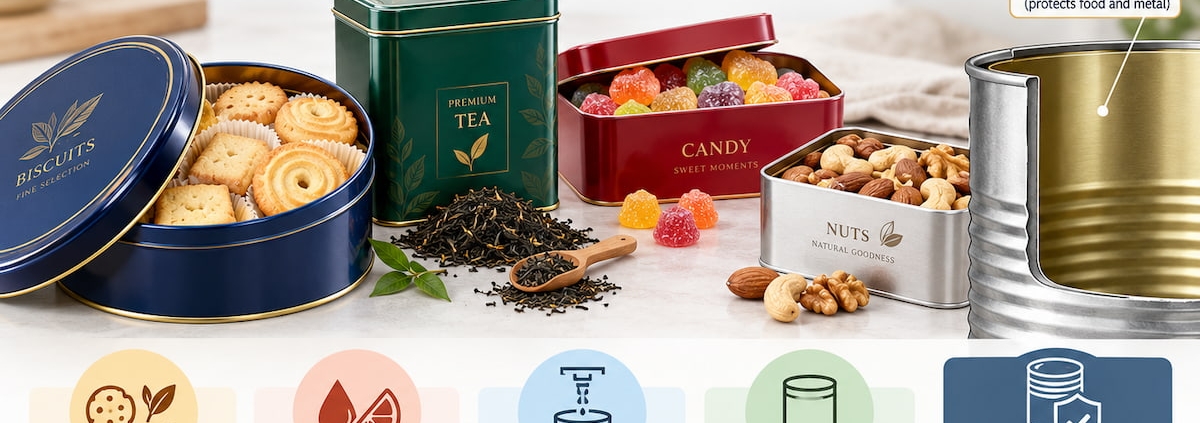
How Is an Inner Lacquer Selected for Different Food Tin Packaging Applications

How Is an Inner Lacquer Selected for Different Food Tin Packaging Applications?

When selecting an interior coating for food tin packaging, it is essential first to understand how the food being packaged will affect the metal surface. At TSING, we never select a coating simply because it is labeled “food-grade.” We first confirm whether the food will contact the tinplate directly and consider its acidity, fat content, moisture content, filling temperature, expected shelf life, and whether an inner bag or tray provides additional barrier protection. These conditions determine the coating’s required chemical resistance, adhesion, flexibility, and suitability for food contact. We then evaluate the final coating specifications based on the intended application and validate them with coated tinplate samples before mass production, ensuring the structure and inner surface of the food tin work together reliably.

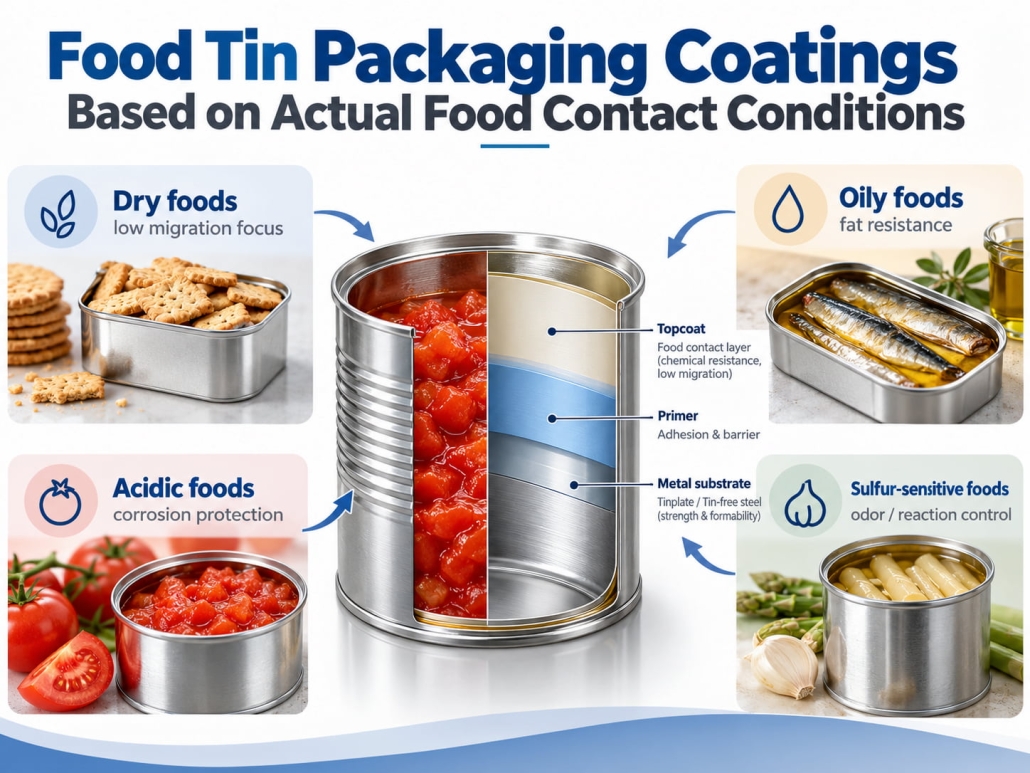
Food Tin Packaging Coatings Based on Actual Food Contact Conditions

The primary consideration is not the coating’s color or whether the inner surface appears transparent, golden, or features other decorative finishes; the key is that the coating must withstand the environmental factors it may encounter throughout the packaging’s lifecycle.
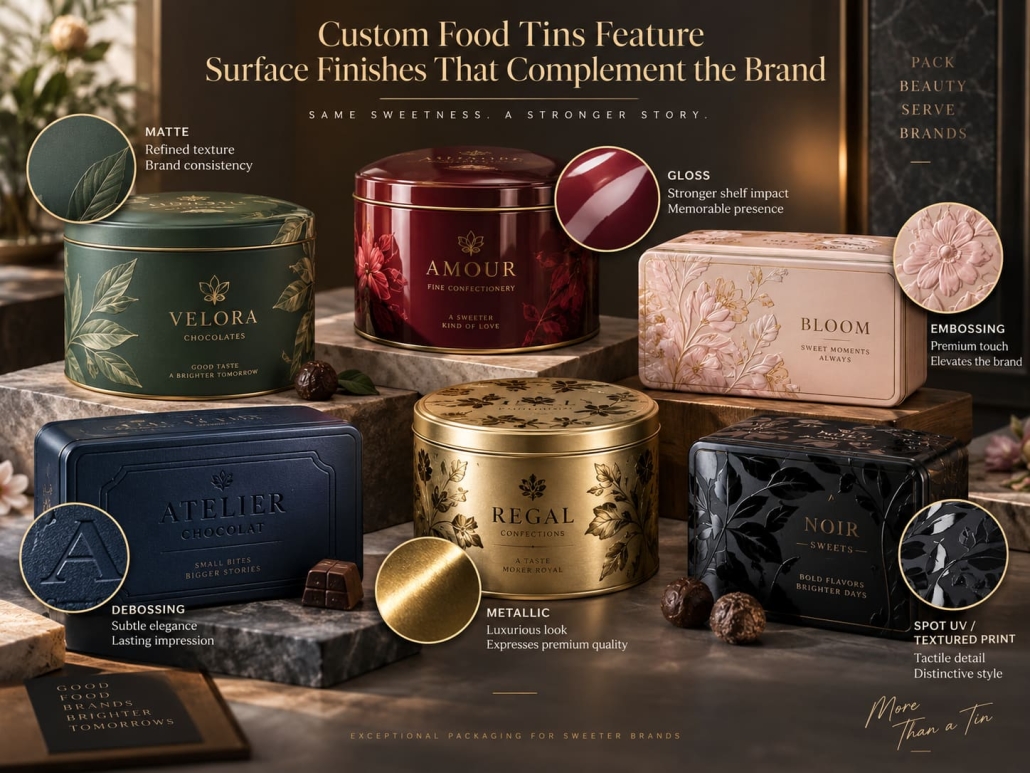
Food contact requirements vary significantly among tea tins, butter cookie tins, candy packaging, and containers for acidic or oily foods. The FDA’s guidance on food contact materials also categorizes food types based on factors such as acidity, moisture content, free fat or oil content, and packaging usage conditions.

Therefore, before determining the interior coating, TSING typically establishes an application profile:

Food ingredients → Direct or indirect contact → Filling conditions → Storage conditions → Expected shelf life → Coating performance requirements

This helps avoid a common procurement pitfall: simply requesting “food-grade coatings” in general terms without specifying the exact application scenario.

Even if two coatings both comply with food contact regulations, they may not be equally suitable for the same food product, temperature, or storage conditions. Therefore, professional tinplate can manufacturers should base coating selection on the intended food product and usage conditions, not solely on appearance.
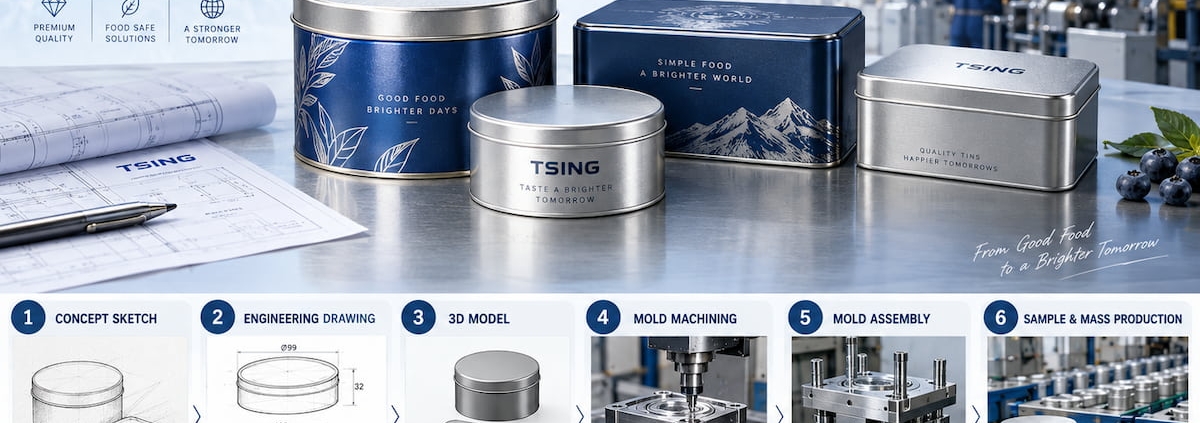
Food Tin Packaging Coatings Based on Actual Food Contact Conditions

Food Tin Packaging for Acidic Foods Requires Particular Attention to Chemical Resistance

Food acidity is critical, as acidic products create a vastly different contact environment than dry, low-reactivity foods.
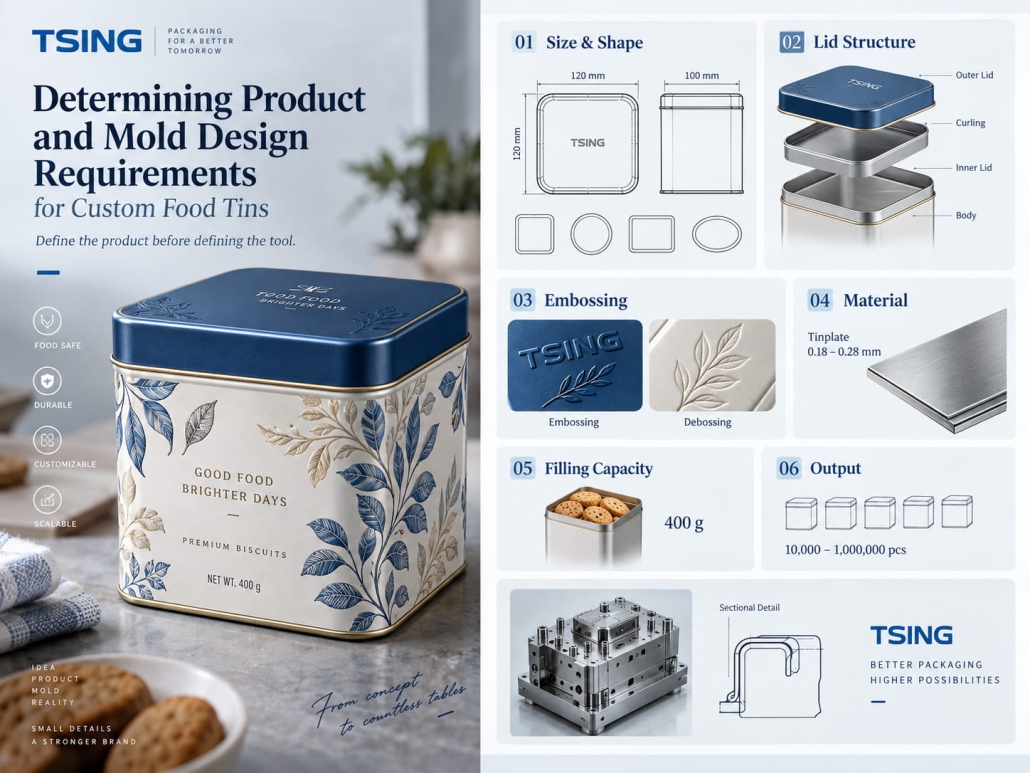
A key design consideration is the integrity of the barrier layer between the food and the metal.

If the coating isn’t suitable for the product, prolonged contact may increase the risk of discoloration, loss of adhesion, surface degradation, or chemical reactions in damaged areas. Therefore, for acidic foods, select a coating that suits the food-contact environment, offers appropriate corrosion resistance, and remains intact after forming and processing.

We have created a simple comparison table for your reference, as shown below:

Food Characteristic Main Concern for Food Tin Packaging Lacquer Selection Focus
Dry, low-moisture food Basic food-contact barrier and surface integrity Approved use, adhesion, forming resistance
Acidic food More demanding chemical contact Acid resistance and long-term coating stability
Moist food Prolonged contact with water-containing product Barrier integrity and corrosion resistance
Acidic + moist food Combined exposure Higher compatibility requirement and validation

Therefore, when considering acidity, also consider factors such as moisture content, storage duration, and whether the food comes into direct contact with the tinplate. A low pH value does not directly determine the coating choice; coating requirements depend on overall food-contact conditions.

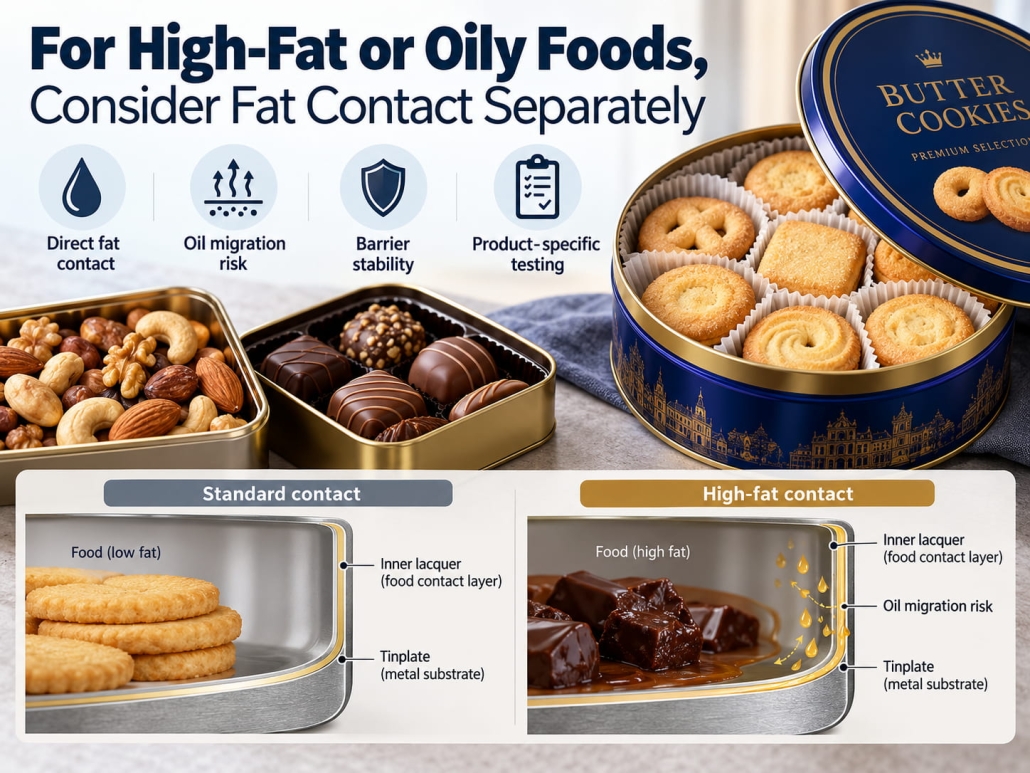
For high-fat or oily foods, consider the issue of fat contact separately

The FDA’s classification standards for food contact materials distinguish between foods containing free fats and those without free fats on their surfaces; for example, baked goods and dry solid foods are classified into different categories based on the presence or absence of free fats.

This distinction matters for foods such as butter cookies, chocolate products, candies, nuts, and others where fats may contact the inner surface of the packaging. Take butter cookies, for example: while they may appear to be a simple dry food, their surface may contain enough fat to create contact characteristics that differ entirely from those of completely dry, fat-free solid foods.

Therefore, when designing tin packaging for such foods, TSING focuses on the following three practical considerations:

Is there free fat present on the food’s surface?
Does the food come into direct contact with the coating?
How long does this contact last before consumption?

If the cookies are individually wrapped or placed in a sealed inner pouch, the tin serves primarily as secondary structural protection and decorative packaging; however, if the unwrapped product comes into direct contact with the coated metal, compatibility between the coating and the actual product becomes critical. This principle also applies to chocolate and candy products.

For high-fat or oily foods, consider the issue of fat contact separately

Food Tin Packaging Requires the Lacquer to Survive Both Food Contact and Tin Forming

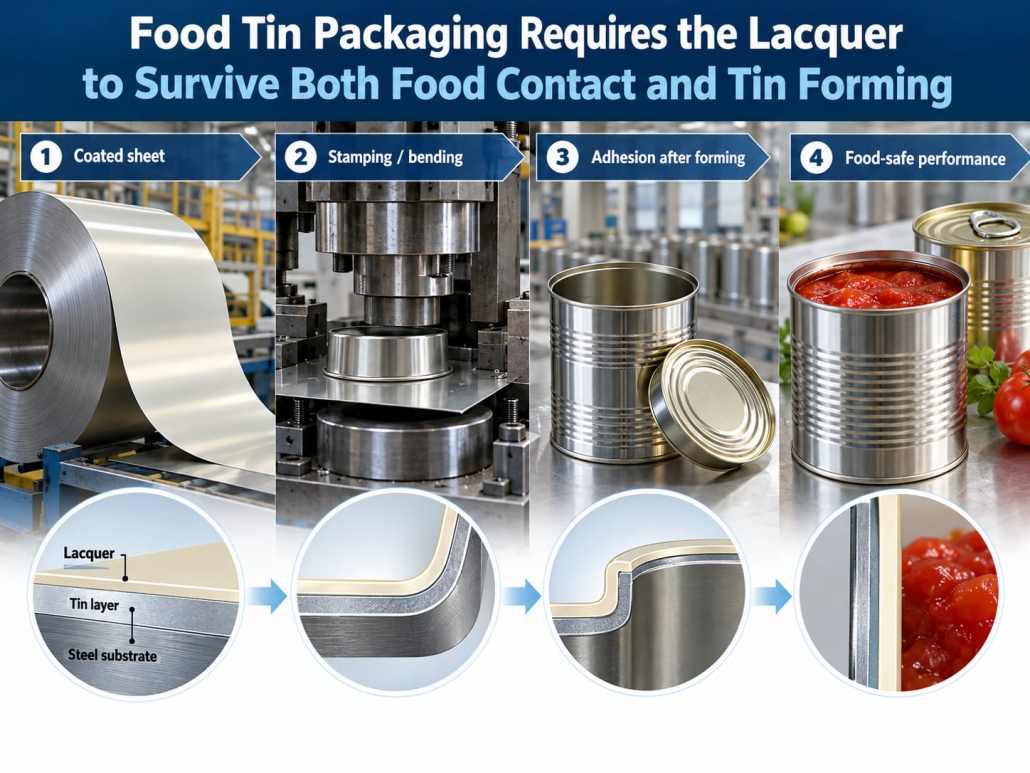
Chemical compatibility is only one factor when selecting a coating. The coating must also withstand the manufacturing processes that transform coated tinplate into final packaging.

During stamping and forming, coated sheet metal may bend, stretch, flange, emboss, or edge-form. If a coating performs well on a flat test panel but develops cracks or loses adhesion after forming, it will fail to provide the expected protection for the final tin packaging.

Therefore, when evaluating coating performance, TSING conducts a comprehensive assessment that considers the tinplate’s physical structure to ensure the expected surface properties are consistently achieved during mass production.

Food Tin Packaging Requires the Lacquer to Survive Both Food Contact and Tin Forming

Verifying coating compatibility

The final selection of a coating should be based on documented suitability for food contact and verification results specific to the application, rather than mere assumptions.

Our verification process follows this logic:

Identify the food type
→ Determine direct contact conditions
→ Evaluate acidity and exposure to fats and oils
→ Determine filling and storage conditions
→ Select appropriate coating specifications
→ Produce coated and formed samples
→ Inspect coating integrity
→ Conduct application-specific compatibility validation
→ Approve for production

Specific validation methods depend on the food’s characteristics and market requirements. Additional validation measures may include reviewing coating supplier data, verifying compliance with applicable food-contact regulations, inspecting formed components, evaluating adhesion, and conducting compatibility testing using representative foods or appropriate test conditions.

Selecting the Right Inner Coating for Food Tin Packaging

The correct selection should be based on five key factors: food acidity, fat content, moisture content and direct contact conditions, processing and storage conditions, and the coating’s ability to remain intact after tinplate forming. Dry, low-fat products have relatively moderate inner-coating requirements, whereas acidic, oily, high-moisture products, or those with prolonged contact times, typically require more rigorous compatibility assessments.

Therefore, from a tin can manufacturer’s perspective, the correct approach is:

Food Characteristics → Contact Conditions → Coating Performance Requirements → Forming Compatibility → Regulatory Compliance and Application Validation

Coatings for food tin packaging must be compatible with the packaged product for intended food-contact use, chemical resistance, forming performance, and verified conditions of use.

Shallow vs. Deep Metal Tin Containers Which Structure Is Better for Your Product

Shallow vs. Deep Metal Tin Containers: Which Structure Is Better for Your Product?

When choosing between shallow and deep metal tin containers, the product itself should be the primary consideration. Before determining can depth, we evaluate required capacity, product dimensions, internal layout, potential movement during transport, display methods, and structural requirements.

Shallow metal tin containers typically make the product easier to access, offer better visual presentation, and suit single-layer arrangements of multi-pack products. Deep metal tin containers, on the other hand, offer greater volume while taking up less floor space, making them better suited to products that are stacked, sold in bulk, or arranged vertically. The choice between these two designs depends on how the product fills the internal space and the container’s functional requirements during filling, transportation, retail display, and consumer use.

Considering Metal Tin Containers Capacity and Internal Space Utilization

Depth directly affects capacity, but greater depth does not necessarily mean higher packaging efficiency.

Given the same length and width, a deeper metal tin container naturally provides greater internal volume. Deep metal cans offer clear advantages when manufacturers need to stack products in layers or fit more products into limited shelf space. For example, bulk tea, candy, coffee, powdered foods, or individually packaged desserts can often use vertical space effectively. By using deeper metal tin containers, brands can increase load capacity without widening the packaging too much.

If products need to be neatly arranged in a single layer and clearly visible, shallower metal tins are generally more suitable.

Take premium assorted cookies as an example: if you plan to place 12 cookies in separate compartments, increasing the can’s depth may leave unused space above the products. Unless additional layers are added, this excess volume does not increase the actual loading capacity.

The relationship is as follows:

Required product volume + Arrangement method + Reserved headspace = Appropriate can depth

A simple capacity comparison illustrates this clearly:

Packaging Requirement Shallow Metal Tin Containers Deep Metal Tin Containers
Single-layer products Very suitable Often unnecessary
Multi-layer packing Limited More suitable
Loose-filled products Moderate capacity Higher capacity
Large visual presentation area Strong Depends on footprint
Compact shelf footprint Less efficient at high capacity More efficient
Easy access to all contents Better May require reaching deeper

Therefore, for custom tin packaging, TSING calculates available internal volume rather than determining depth solely from external dimensions.

Reducing Shaking Through a Reasonable “Depth-to-Layout” Ratio

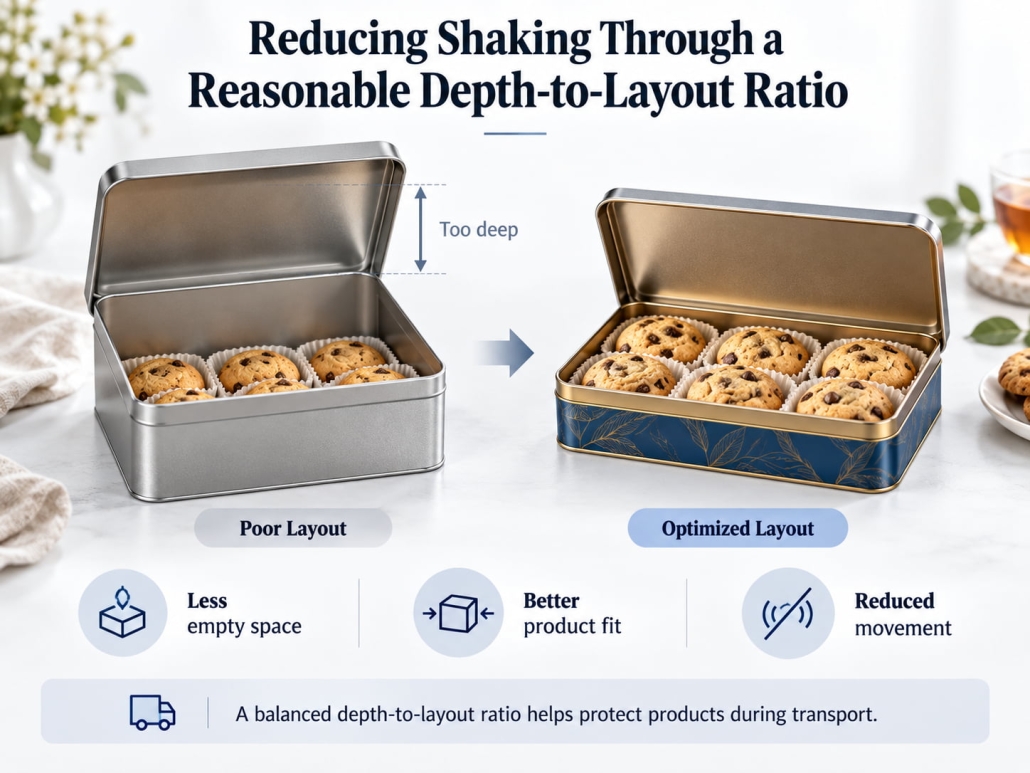
Simply choosing a shallow tin can does not effectively control product shaking.

If the can’s base is much larger than the product’s footprint, the product may still shift even in a shallow can. However, a deep metal tin container can hold the product securely when its internal space includes proper dividers or suitable filling materials.

For metal tins containing cookies, chocolate, or candy, the packaging design should prevent excessive horizontal or vertical displacement of the products. Products arranged in a single layer are typically well-suited for shallow metal cans, as they can be placed in trays, paper cups, or dividers, leaving limited headspace.

If manufacturers pack the same products in deep cans without effective internal supports, the products may shift vertically or become disarranged during transport.

Therefore, deep can structures typically require additional internal design elements, such as:

Interlayer dividers → Second layer of products → Top padding or headspace control

However, the situation is different for loose tea or individually wrapped candies. Because the contents can fill most of the available space, a deeper structure may not cause the same rattling issues.

From TSING’s perspective, the real question is not:

“Do shallow or deep containers better prevent shifting?” but rather, “After filling with the actual product and internal securing structures, which depth leaves the least amount of uncontrolled space?”

Only then can you choose the right packaging structure.

Reducing Shaking Through a Reasonable Depth-to-Layout Ratio

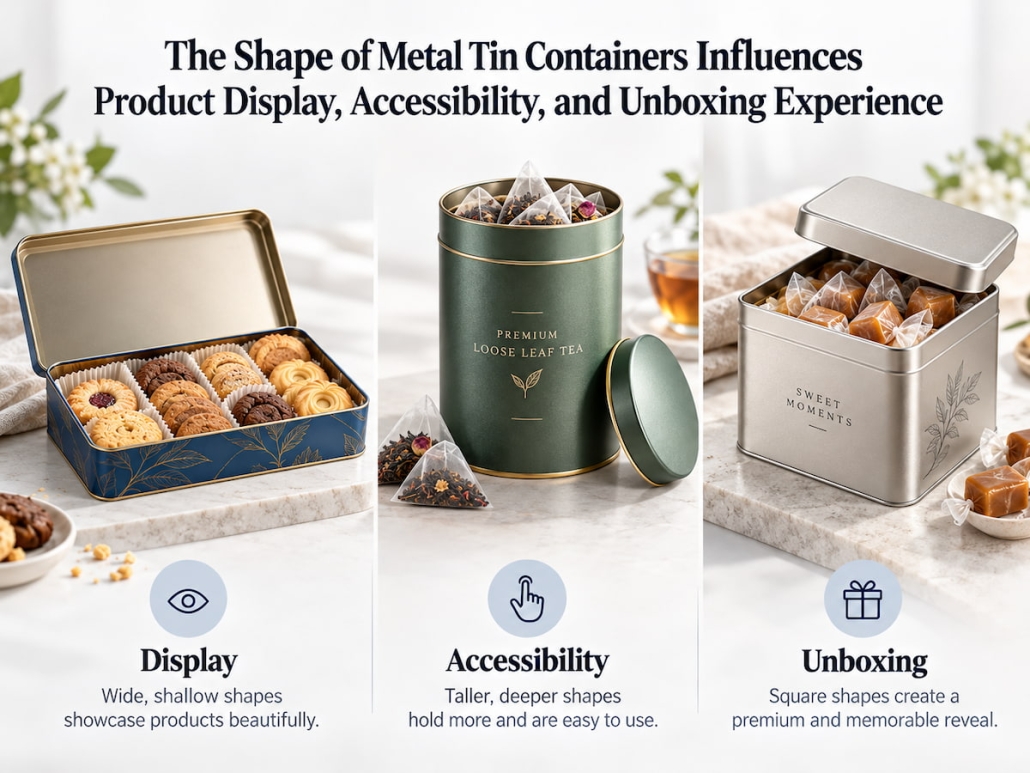
The Shape of Metal Tin Containers Influences Product Display, Accessibility, and Unboxing Experience

The container’s depth also shapes how consumers view and interact with the product.

Shallow metal tin containers typically offer a more intuitive display, as most—if not all—of the product is visible at a glance once the lid is opened. This design suits premium cookies, chocolates, assorted candies, gift sets, and products arranged by color, shape, or flavor. The shallow structure also makes it easier to retrieve individual items. For this reason, wide, shallow tin packaging often works better for products where the unboxing experience is part of the brand experience.

Deep-profile tins, by contrast, offer a completely different experience. They convey an impression of “substantial quantity” and take up less shelf space; however, products at the bottom are relatively difficult to access.

Furthermore, retail display requirements cannot be overlooked. Shallow, rectangular tins may require more shelf space, while taller tins can use vertical space more efficiently.

Therefore, decisions regarding display methods involve two distinct questions:

“How should the packaging appear on the shelf?” and “What should consumers see when they open the can?”

These two requirements don’t always point to the same packaging structure, so customers must judge and choose.

The Shape of Metal Tin Containers Influences Product Display, Accessibility, and Unboxing Experience

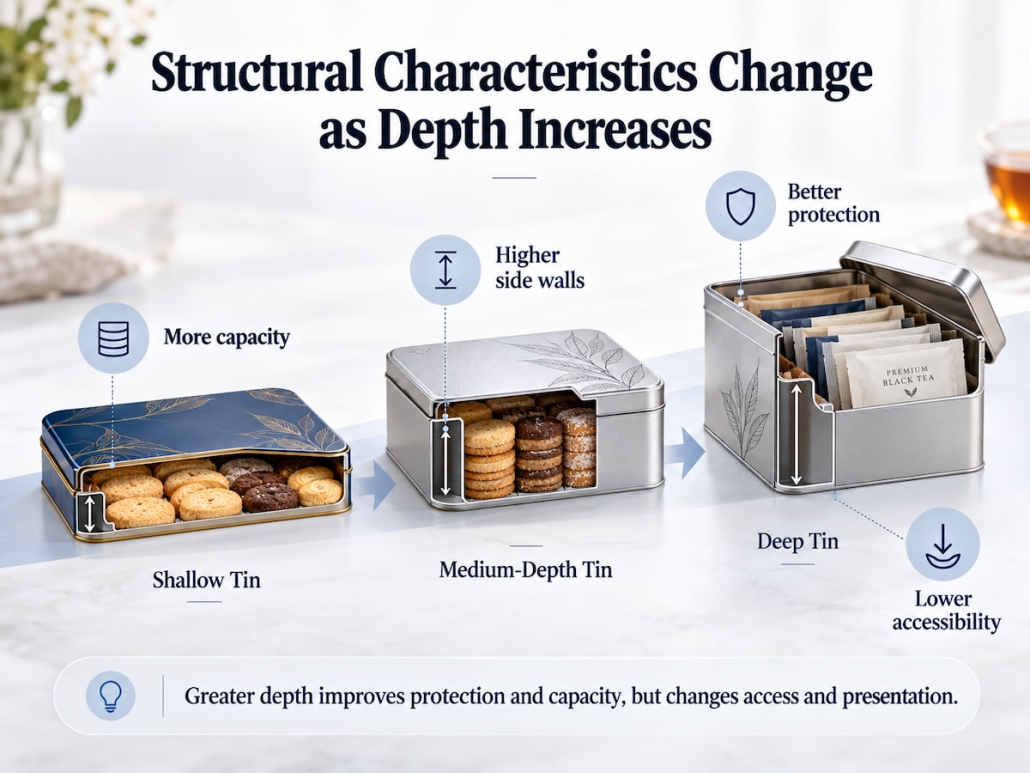
Structural Characteristics Change as Depth Increases

Depth affects not only capacity but also the can’s forming characteristics and rigidity.

Shallow cans typically have shorter side walls, which makes the can body less prone to sidewall deformation. However, for large, shallow cans, if the lid or bottom panel area is too large relative to the selected tinplate thickness and structure, the panel may experience bending deformation. Longer side walls mean a larger vertical surface area, so pay closer attention to side wall stability, corner geometry, forming depth, and stacking loads.

This means that structural rigidity cannot be determined by depth alone; rather, it must be assessed by combining the following factors:

Can dimensions + sheet area + forming depth + tinplate thickness + structural reinforcement design = overall rigidity

For example, deep rectangular tins can enhance sidewall stability through appropriate corner design or structural ribs, whereas wide, shallow cans may require sufficient lid depth or sheet reinforcement to minimize bending deformation.

Well-designed metal cans achieve the required rigidity through a combination of material thickness and structural geometry.

Structural Characteristics Change as Depth Increases

Choosing Tin Boxes Based on Product, Packaging Method, and User Experience

No single depth works for every food or gift.

The most effective approach is to link the product’s characteristics directly to the tin box’s structure.

Shallow tin boxes are generally better suited for:

single-layer cookies, premium chocolates, assorted candy gift boxes, stationery sets, flat promotional items, and other products where visual presentation and ease of access are prioritized.

Deep tin boxes are generally better suited for:

loose-leaf tea, coffee, candy, stacked cookies, individually wrapped foods, powdered products, and situations that need larger capacity in a smaller footprint.

Some products fall between these two categories. In such cases, we typically evaluate the actual packaging layout before determining the final depth.

Which Is Better—Shallow or Deep Metal Tin Containers?

When visual appeal, easy access, a single-layer arrangement, and a premium look matter more than maximum capacity, choose shallow metal tin containers. When products require greater capacity, multi-tier stacking, bulk filling, or minimal shelf space, choose deep metal tin containers.

From a tin can manufacturer’s perspective, the optimal structure should use internal space efficiently while preventing unnecessary product movement, without compromising display appeal or structural strength.

How Are Cigarette Tin Case Size Dimensions Controlled During Stamping and Forming

How Are Cigarette Tin Case Size Dimensions Controlled During Stamping and Forming?

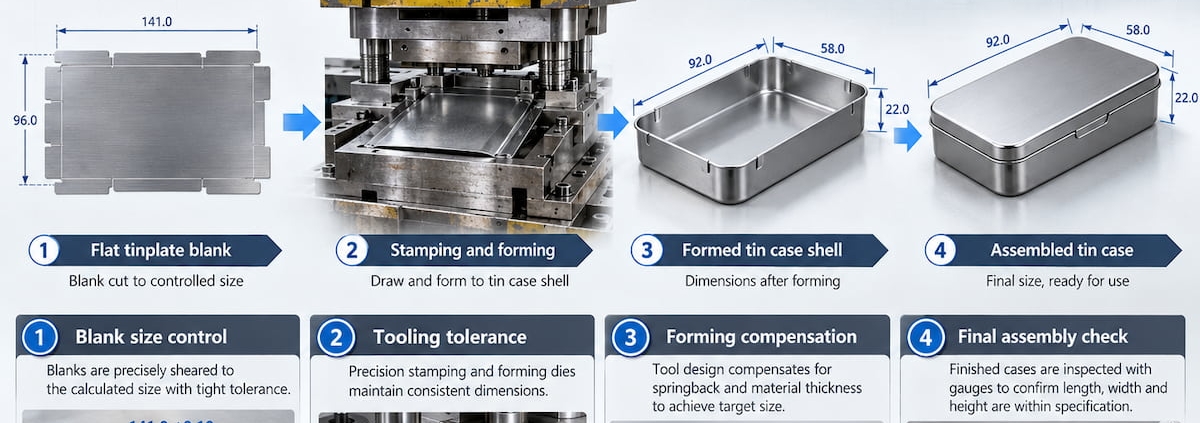
In the stamping process, control of cigarette tin case size dimensions begins before the first tin blank enters the stamping press. We first determine the finished product’s external dimensions, usable internal space, corner radius, body height, lid depth, and the lid-to-body fit based on the cigarette specifications and box structure. We then convert these target dimensions into blank dimensions, die geometry parameters, and forming allowances, fully accounting for material flow characteristics during stamping. After forming, we measure the prototype samples and conduct a combined inspection of the fit and alignment accuracy between the assembled lid and body. This approach helps us control the nominal dimensions of the cigarette tin case and ensure high consistency and repeatability during mass production.

Cigarette Tin Case Size Control Begins With Functional Dimensions

Simply inspecting the overall length, width, and height of a cigarette tin is insufficient for effective dimension control. Some dimensions affect the product’s assembly fit, closure performance, and appearance far more than others.

Therefore, TSING classifies drawing dimensions into critical functional dimensions and general appearance dimensions.

Critical Dimension Why It Matters
Outside length and width Determines overall case size and lid alignment
Internal usable dimensions Controls cigarette or insert fit
Body height Affects capacity and lid clearance
Lid depth Determines engagement with the body
Lid-to-body clearance Controls whether the case feels loose or tight
Corner radius Influences internal space and forming stability
Edge or curl dimensions Affect assembly and finished feel

The key point is that these dimensions are interrelated.

For example, increasing the external width does not necessarily mean that the usable internal width will increase accordingly. Rounded corners, formed side walls, rolled edges, and the lid structure all take up space.

The dimensional relationship between the lid and the body is particularly sensitive. If the body is formed slightly wider and the lid is produced slightly narrower, even if both components are close to the target values, the final assembled unit may close too tightly. Therefore, we manage cigarette tin dimensions using an “assembly dimension system” rather than a series of unrelated dimensional data points. This is especially important for custom tins designed for specific cigarette counts, filter lengths, liners, or internal layouts.

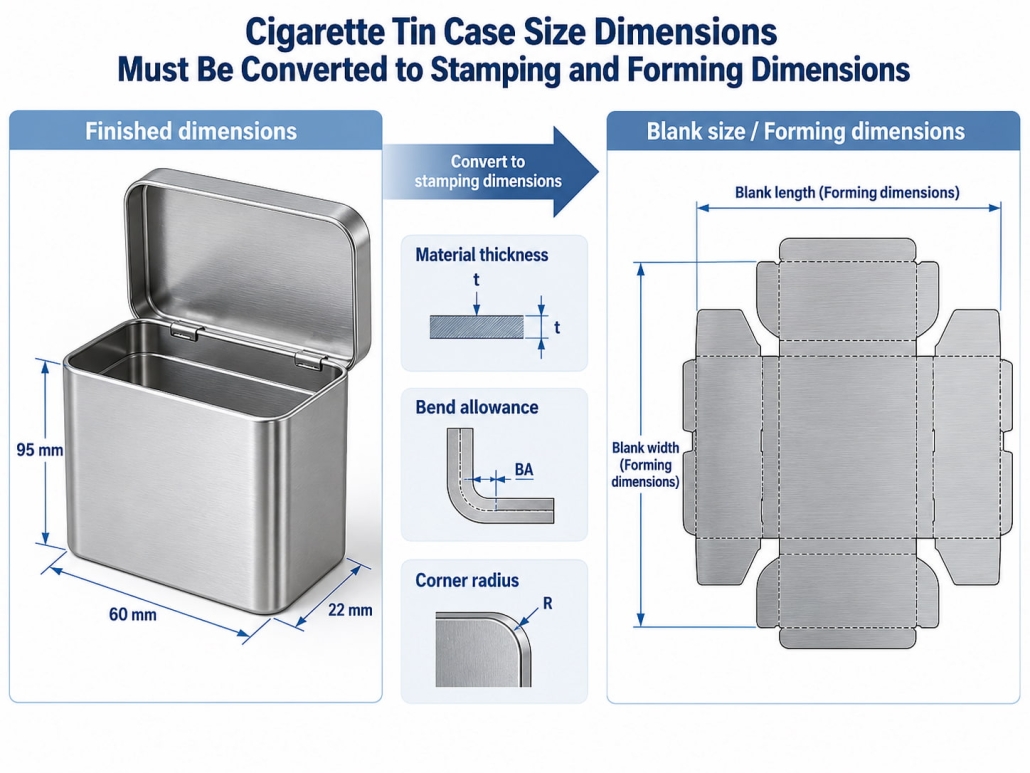
Cigarette Tin Case Size Dimensions Must Be Converted to Stamping and Forming Dimensions

You cannot apply the finished dimensions shown on product drawings directly to flat tinplate sheets.

A cigarette tin initially starts as a flat blank. During production, the blank undergoes stamping, deep drawing, bending, flanging, or other forming processes to become a three-dimensional tin body and lid. In this process, the material transitions from a flat state and distributes across the side walls, corners, edges, and other structural features.

The dimension conversion process can be understood as follows:

Finished cigarette tin dimensions
→ Blank dimensions
→ Die geometry
→ Forming allowance
→ Trial stamping
→ Finished product measurement

For rectangular cigarette tins, engineers must consider not only the final length and width but also ensure the blank has enough material to form the side walls and corners without excessive stretching or deformation. Of course, the forming depth also affects the calculations. Shallow cigarette tins require relatively little material displacement, whereas deeper tins place higher demands on corner and vertical side-wall forming.

A common production principle is:

Target dimensions refer to the dimensions after forming, not before stamping.

Clarifying this distinction enables stable control of cigarette tin dimensions.

Cigarette Tin Case Size Dimensions Must Be Converted to Stamping and Forming Dimensions

The Corner Dimensions of Cigarette Tins Depend on Controlled Material Flow

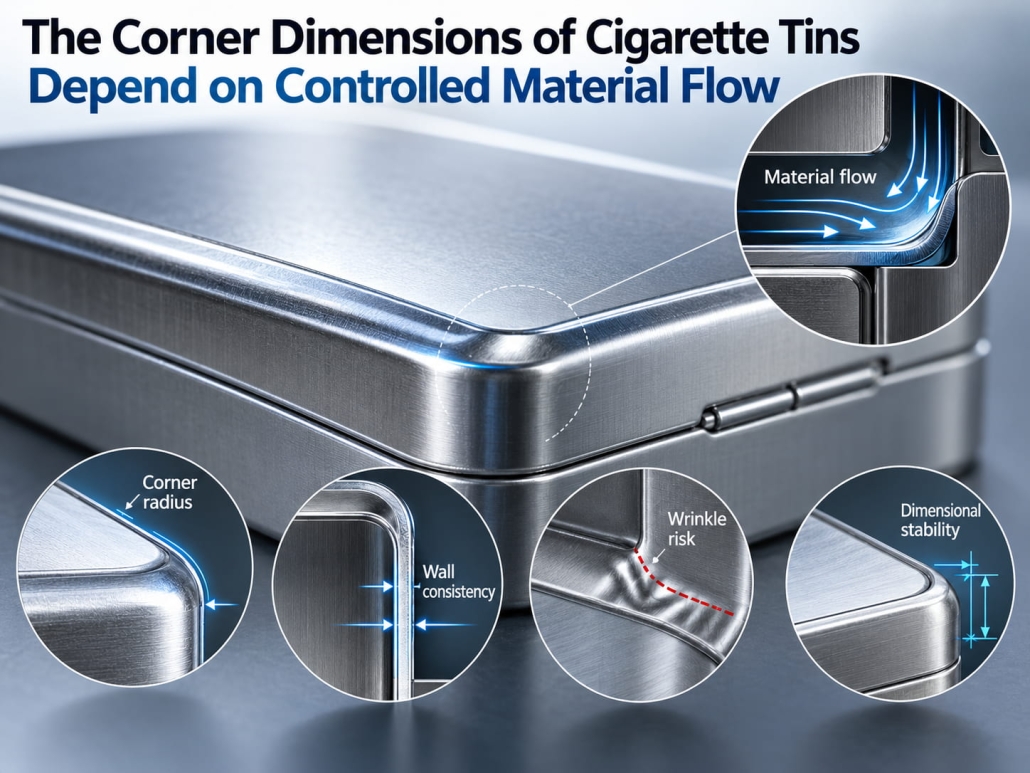
For rectangular cigarette tins, the corners are among the most process-sensitive areas because the metal’s forming characteristics there differ greatly from those on straight tin walls. On straight sections, the bending or stretching of the material is relatively predictable; at corners, however, the tinplate must both change its flow direction and undergo simultaneous stretching or compression to form a three-dimensional shape. This means the corner geometry directly affects the finished product’s length, width, wall position, and lid fit.

A smaller fillet radius produces a sharper, more aesthetically pleasing visual effect, but it also concentrates forming stresses in a smaller area. If the fillet radius is designed too aggressively relative to the material thickness and forming depth, it may lead to the following issues:

Uneven fillet radius → Box wall deformation → Dimensional deviations → Poor lid alignment

Therefore, corner design is a critical component of the overall structural design.

The most important interrelated factors include:

Corner radius + Molding depth + Tinplate thickness + Mold geometry

These four factors must work in concert to design a corner structure that looks clean and sharp, meets the specified dimensions for cigarette tins, and maintains high consistency during mass production of thousands of units.

The Corner Dimensions of Cigarette Tins Depend on Controlled Material Flow

Controlling Dimensional Deviations in Cigarette Tins Throughout the Production Process

Dimensional deviations rarely stem from a single, isolated issue. In most cases, the final dimensional differences result from the cumulative effect of multiple minor production variables.

The table below shows how common sources of variation can affect the finished cigarette tin case size.

Source of Variation Possible Result
Incorrect blank dimensions Changes final length, width, or wall height
Tinplate thickness variation Alters forming behavior and mating fit
Tool wear Gradually shifts component dimensions
Punch and die misalignment Creates uneven walls or asymmetric corners
Material springback Changes wall position after leaving the tool
Unstable forming pressure Produces inconsistent depth or shape
Corner-forming variation Affects overall footprint and alignment
Edge-forming variation Changes lid or body engagement

These factors rarely act independently.

For example:

Deviation in body dimensions + deviation in lid dimensions + deviation in edge forming = final closure fit

If the body is slightly oversized but the lid is at the appropriate end of its tolerance range, the overall fit may still be acceptable. Quality control during production must not stop at the first-piece trial stage. Even if the mold is adjusted to produce a perfect first piece, gradual dimensional changes may still occur during prolonged continuous production. Therefore, evaluate critical dimensions early in production and conduct regular inspections throughout the process.

Verifying the Dimensions of Cigarette Tin Case Size After Forming and Assembly

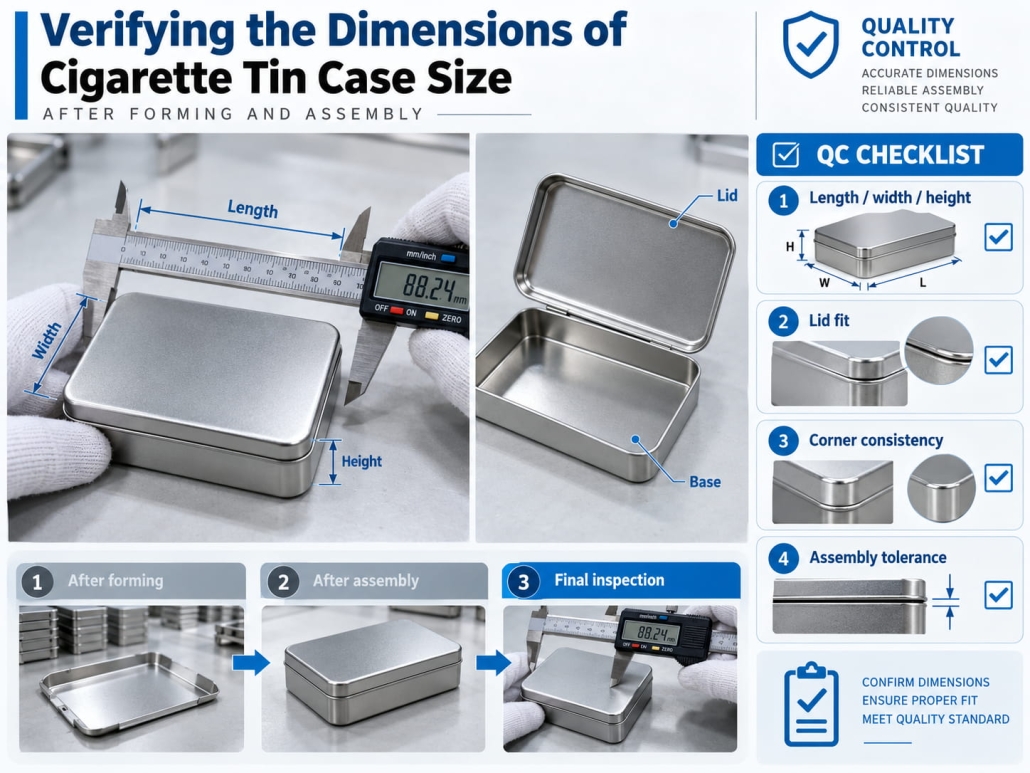
Conduct final dimensional verification after the cigarette tins are fully formed and assembled, as only then does the actual fit between components become apparent. Dimensional verification typically combines actual measurements with functional assembly tests.

The inspection focuses on the following four aspects:

1. Overall Dimensions:
Compare the finished product’s length, width, and height with the approved specifications.

2. Internal Capacity:
Inspect the usable internal dimensions to confirm that the intended cigarettes, liners, or internal layout fit properly.

3. Forming Quality:
Inspect the corners, side walls, base, and edge structures to confirm the absence of any deformation that could affect dimensional accuracy.

4. Fit Between Lid and Body:
The lid must align precisely, snap securely into place, and open without requiring excessive force.

This final point is particularly important because caliper readings alone cannot fully assess the effectiveness of dimensional control. Even if the dimensions of both the body and the lid are within tolerance, the fit between the two when assembled may still be unsatisfactory. Therefore, TSING must measure and test finished cigarette tins.

Verifying the Dimensions of Cigarette Tin Case Size After Forming and Assembly

Controlling Dimensional Accuracy During Stamping and Forming

To effectively control the dimensions of cigarette tins during stamping and forming, TSING focuses on four core areas: defining the critical dimensions of the finished product, translating these dimensions into precise die and blank specifications, controlling material flow during the forming process, and verifying the fit between the lid and the body throughout the entire production process.

Key dimensions include the finished product’s length, width, height, effective internal volume, corner radius, lid depth, and the fit clearance between the lid and body. Integrate dimensional requirements into the stamping and forming processes from the start, and verify them repeatedly after forming and assembly. Only when the internal volume, external dimensions, corner geometry, and lid-to-body fit remain consistent across all production batches can we say the cigarette tin’s dimensional specifications have been properly controlled.

How Should You Compare Quotations From Different Custom Tins Supplier

How Should You Compare Quotations From Different Custom Tins Supplier?

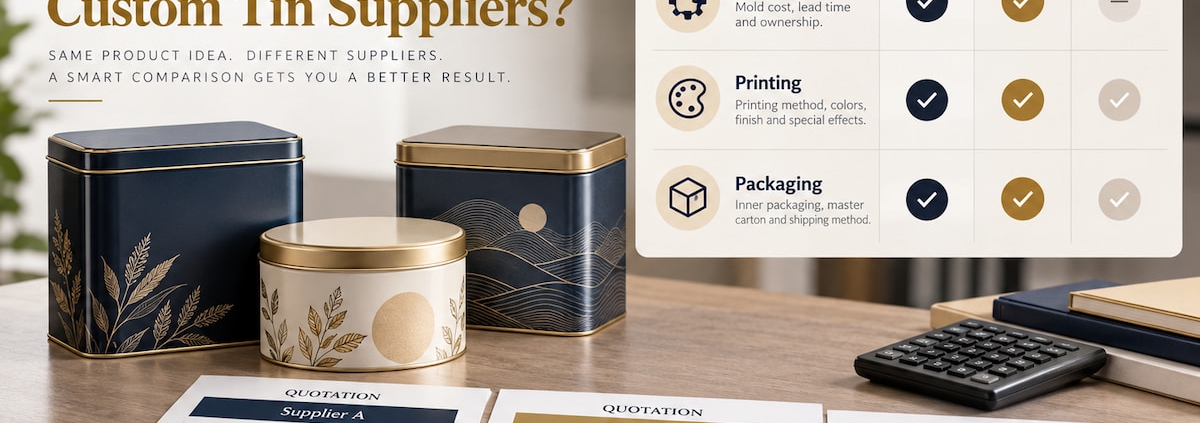
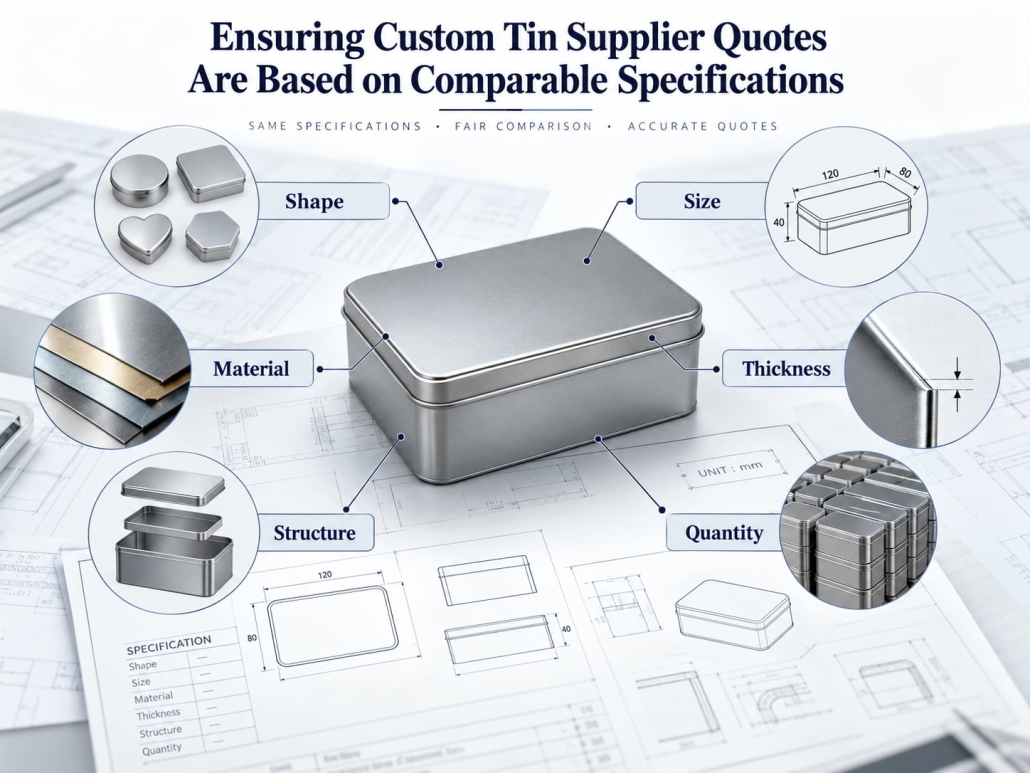
When comparing quotes from different custom tins supplier, buyers should first confirm that each supplier’s quote is based on the same specifications, including tin box dimensions, tinplate thickness, lid structure, printing process, surface treatment, order quantity, and packaging method. Next, they should separate one-time mold costs from regular production costs and confirm whether the quote includes printing plates, molds, liners, pallets, export cartons, and other accessories. We recommend that buyers compare quotes item by item and calculate the actual total cost based on identical finished packaging specifications. Only when technical requirements are aligned can buyers accurately determine which tin box manufacturer offers the best Value.

Comparing Custom Tins Supplier Based on Identical Technical Specifications

Price differences often stem from varying specifications, rather than simply one supplier charging more. Before evaluating mold fees, printing costs, or packaging expenses, buyers should ensure that each quote describes an identical finished tin box. Otherwise, two prices that seem directly comparable may reflect different materials, structures, surface finishes, or production requirements.

Ensuring Custom Tins Supplier Quotes Are Based on Comparable Specifications

First, compare technical specifications item by item. For each quote, verify the following information:

Finished product length, width, height, or diameter
Tinplate thickness
Tin box shape
Lid type
Body and base structure
Printing method
Surface varnish or finish
Embossed or debossed effects
Internal tray or liner
Order quantity
Unit packaging method
Outer carton dimensions

For example, one custom tin box manufacturer might quote a tin body made of 0.23-millimeter-thick tinplate, while another uses 0.28-millimeter-thick material. Deeper lids, reinforced bottoms, or more complex forming structures will also increase production costs. The same applies to printing. A simple four-color design cannot be compared to a design requiring white ink, spot colors, metallic effects, and embossing.

Therefore, buyers should develop a confirmed specification sheet and require suppliers to quote based on it.

Ensuring Custom Tins Supplier Quotes Are Based on Comparable Specifications

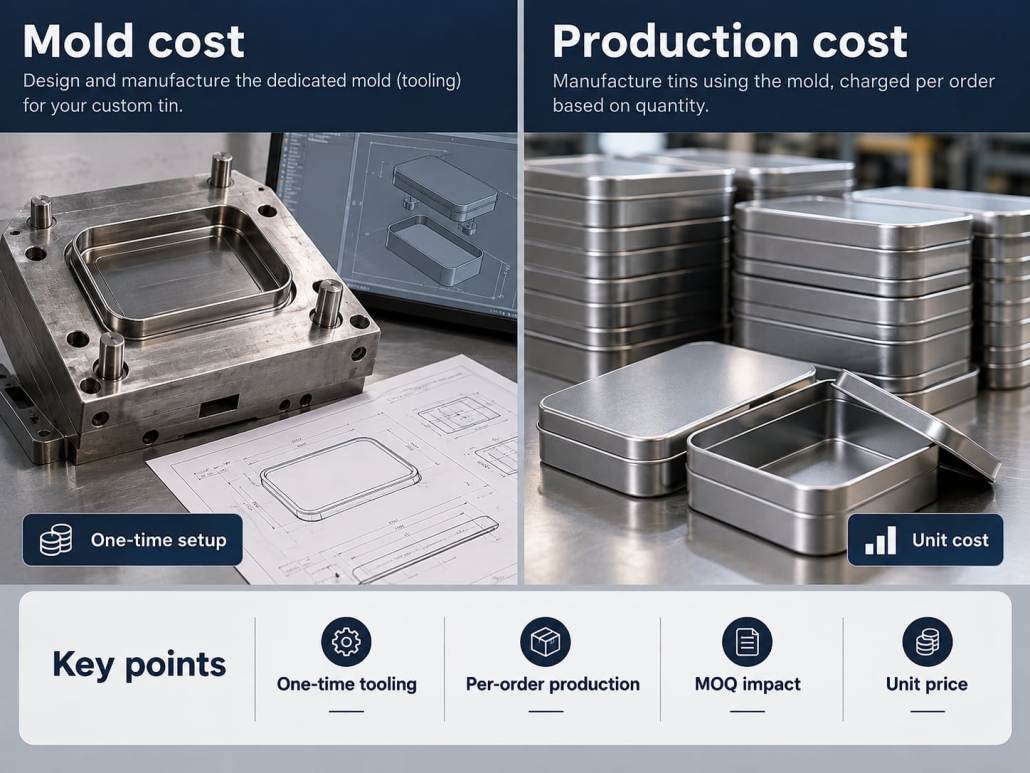
Custom Tins Supplier Should Clearly Distinguish Between Mold Costs and Production Costs

Mold costs are particularly critical when a project involves new tin box dimensions, special lid structures, custom embossing techniques, or irregular shapes. Some custom tin box suppliers may include part of the mold cost in the unit price, while others list it separately. Still, others may already have ready-made molds available, eliminating the need for additional production.

Therefore, the quotation should clearly specify the following:

Whether ready-made molds are available
Whether new production molds need to be manufactured
Whether embossing mold fees are charged separately
Whether prototype mold fees are included
Whether mold fees are a one-time charge or a recurring charge
Whether the customer can reuse the mold for subsequent repeat orders

This distinction is particularly important for customers placing repeat orders in the future.

For example, Supplier A may offer a lower unit price but charge a high fee for new molds, while Supplier B may have a suitable existing mold and not charge a new mold fee. For small initial orders, this difference can significantly affect total project cost.

Custom Tins Supplier Should Clearly Distinguish Between Mold Costs and Production Costs

Clearly List What Is Included in Printing Costs

Printing is another area where “quotes may appear similar but actually cover different services.” Buyers should confirm whether the quote includes the following items:

Plate fees or prepress fees
CMYK four-color printing
White undercoat/base coat
Pantone spot colors
Metallic finish effects
Matte or glossy varnish
Spot varnish (spot gloss)
Embossing registration (registration printing)

For some custom tin cans, aesthetic and finishing requirements directly affect cost.

The cost of a standard printed tin with a full-surface gloss varnish differs greatly from that of a high-end candy tin featuring a matte varnish, multiple spot colors, metallic details, and precise embossing. Also consider the design’s complexity. If a supplier provides a quote before receiving the final design, the buyer should confirm whether the price may change after reviewing the printing specifications.

Clearly List What Is Included in Printing Costs

Consider Accessories and Overall Delivery Value When Comparing Custom Tins Supplier

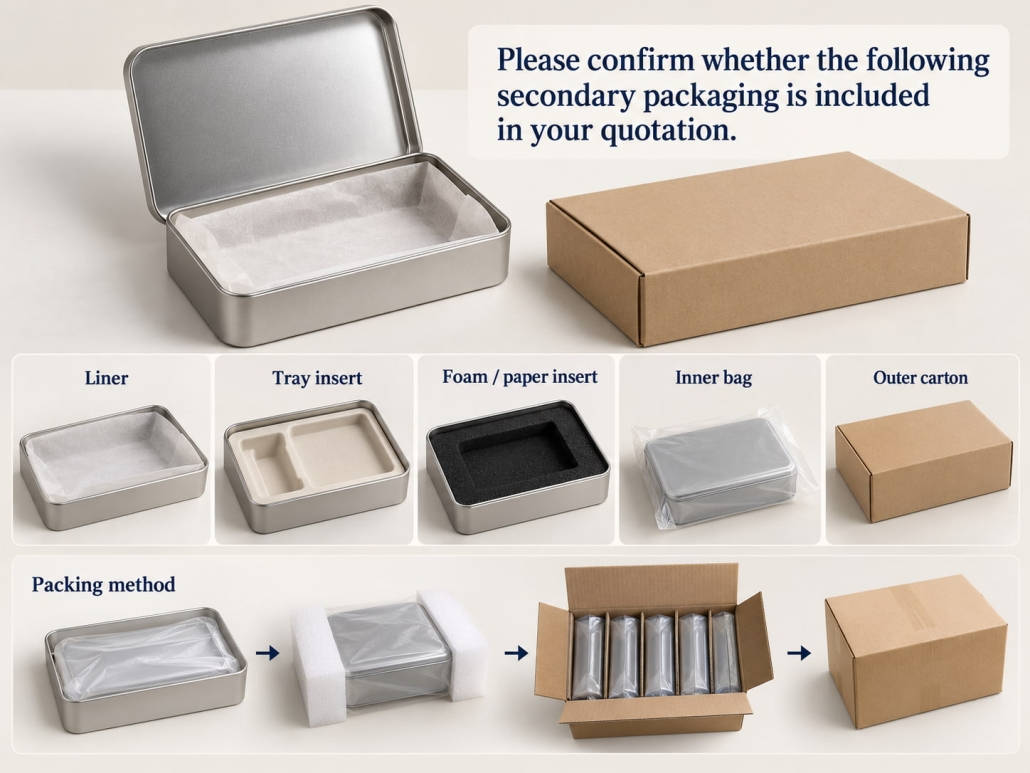
After determining tin box specifications, molds, and printing requirements, buyers should also consider the post-production process. Inner liners, trays, individual item protection, export cartons, packing quantities, and shipping preparations all affect the final procurement cost. Include these factors in the comparison, and don’t treat them as insignificant details.

Clarify Whether Liners, Inserts, and Cartons Are Included

The unit price quoted may cover only the tin itself. For projects involving food, candy, tea, cookies, or gift packaging, additional components may include plastic trays, cardboard dividers, paper cups, and other accessories. These items will impact the final cost.

For example, one supplier’s unit price for a tin box may be lower but exclude molded trays and export cartons. In contrast, another supplier’s quote, though slightly higher, may already include all of the aforementioned accessories. In comparison, the latter’s quote may actually result in a lower overall packaging cost. Buyers should also compare carton specifications, including: quantity per carton, carton dimensions, carton strength, internal dividers, export packaging methods, and so on.

This is especially important for international long-distance shipping, as improper outer packaging may cause dents, surface scratches, or warped lids on tin boxes during transit. Therefore, professional custom tin box manufacturers should clearly specify the packaging scope and not simply quote the ex-factory price of the tin box without accessories.

Clarify Whether Liners, Inserts, and Cartons Are Included

The Final Total Project Cost Prevails

The final cost comparison should aggregate all necessary expenses into a single, comparable total project cost. Specifically, refer to the following:

Unit price of tin boxes + Mold/tooling costs + Printing and plate-making fees + Inner trays or liners + Individual packaging + Export outer cartons + Other necessary accessories = Comparable total project cost

For repeat orders, exclude one-time mold costs and recalculate the figures. Buyers should also compare various commercial terms, such as:

MOQ
Prototyping costs
Prototyping lead time
Mass production lead time
Payment terms
Quality inspection requirements

Before selecting a custom tin box supplier, ensure that you are comparing the exact same finished tin box product. Only then can you accurately and fairly evaluate quotes from different manufacturers.

Comparing Different Custom Tin Box Suppliers to Make the Best Choice

To compare quotes from different custom tin box suppliers accurately, buyers should first ensure all suppliers quote the same finished product specifications. The comparison should cover tin box dimensions, tinplate thickness, lid construction, printing processes, surface finishes, order quantities, and packaging configurations. Next, list all one-time and additional costs separately, including mold fees, printing plate fees, inner trays or liners, individual packaging, and export cartons.

The key is to compare identical finished packaging solutions, not just unit prices. The most reliable way to compare quotes is to contrast the total cost of producing the same custom tin box under identical technical and packaging requirements.

What Design Details Should You Confirm Before Ordering Custom Food Tins in Bulk

What Design Details Should You Confirm Before Ordering Custom Food Tins in Bulk?

Before placing a bulk ordering custom food tins, buyers should confirm details such as packaging dimensions, product layout, tin structure, lid type, printed designs, surface finishes, and internal trays or dividers. At TSING, before finalizing production specifications, we also need to understand the type of food, the quantity per box, reference dimensions, preferred opening method, design files, and the estimated order quantity. These details determine whether we can use existing molds, the tin forming process, the placement of printed designs, and how well the finished packaging fits the product. Confirming these requirements before mold fabrication, printing, and mass production helps minimize revisions, ensures a smoother transition from prototyping to production for bulk orders of food tins, and avoids unnecessary changes.

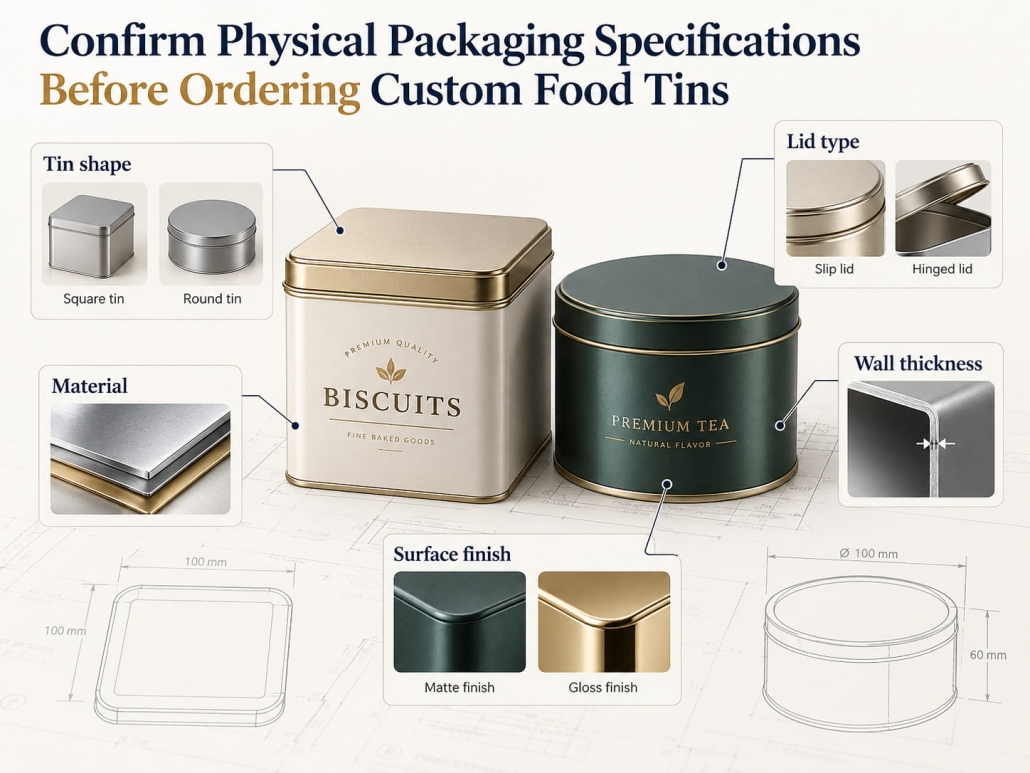
Confirm Physical Packaging Specifications Before Ordering Custom Food Tins

Before approving print files, determine the tin’s physical structure. The tin’s dimensions, internal space, product arrangement, lid shape, and forming details all influence the final artwork template and production process. Therefore, we recommend establishing the functional packaging specifications first, then defining the desired aesthetic design requirements based on the confirmed structure.

Confirm Physical Packaging Specifications Before Ordering Custom Food Tins

Specify Internal and External Dimensions When Ordering Custom Food Tins

Never determine dimensions based solely on the product name.

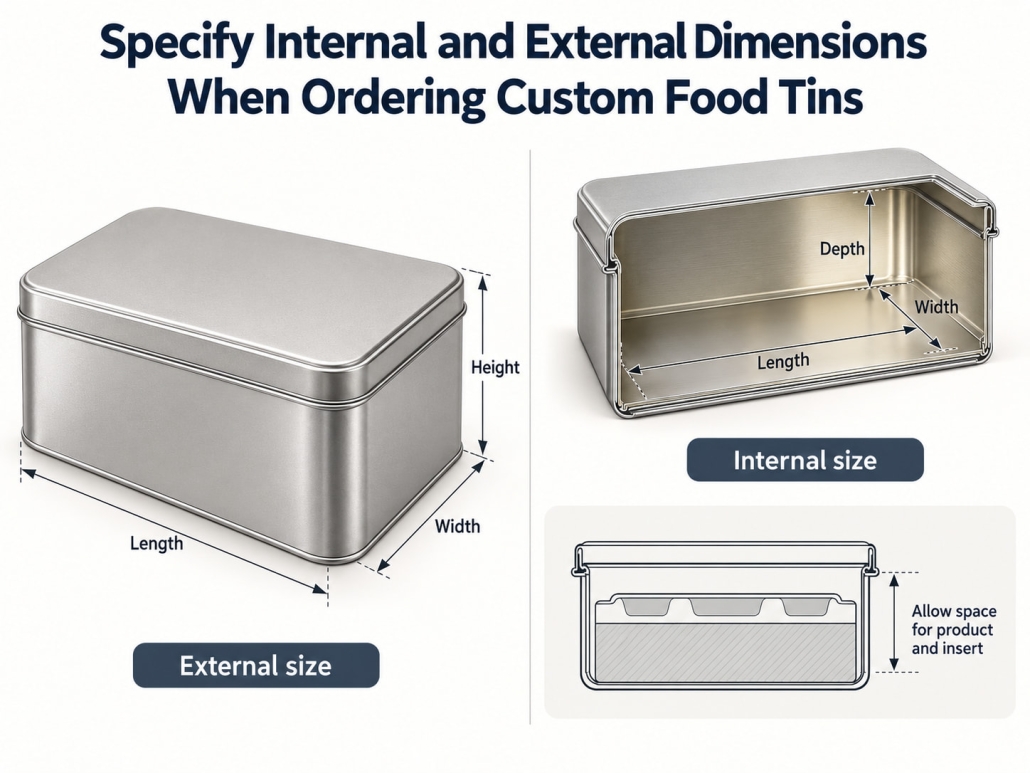
When customers request custom cookie tins, they must still specify the exact dimensions and arrangement of the cookies; even when holding the same number of cookies, different arrangements may require significantly different internal volumes. Before producing custom food tins, TSING typically confirms the following information:

Finished tin dimensions (LxWxH)
Finished diameter and height of round tins
Product dimensions
Number of products per tin
Tray or divider dimensions
Lid depth, or the length by which it extends into the body of the tin

For example, if twelve cookies are placed in a molded tray, the tin must accommodate the cookies and allow for the tray’s wall thickness, edge clearance, and vertical space beneath the lid. Selecting only the external dimensions without accounting for the internal structure may result in packaging that looks suitable but cannot hold the finished product.

Therefore, for bulk customization projects involving food tins, TSING recommends confirming the complete packaging layout before finalizing the dimensions.

Specify Internal and External Dimensions When Ordering Custom Food Tins

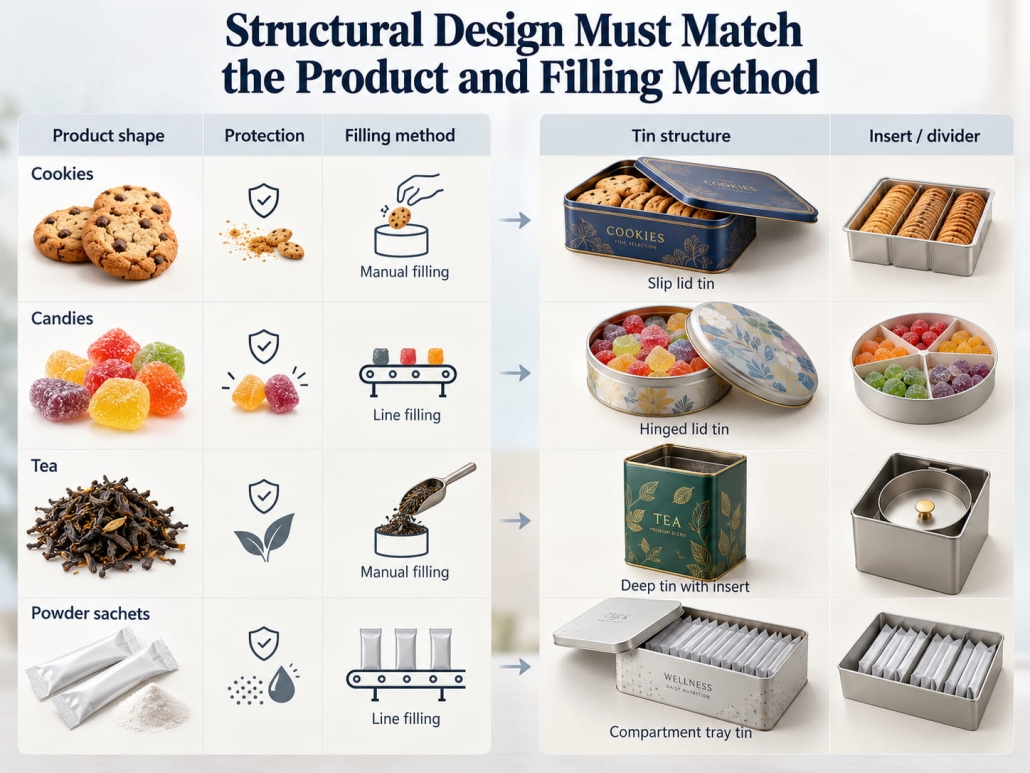
Structural Design Must Match the Product and Filling Method

After determining the dimensions, customers should specify the tin’s structural design requirements. Key structural design considerations include:

Body Shape: Round, square, rectangular, or irregular
Lid Type: Separate or integrated
Edge finishing: rolled edges or formed edges
Surface finish: embossed (raised) or debossed (recessed) effects
Internal components: inner trays or dividers

Stacking requirements
Opening mechanism: hinged (flip-top) or removable lid
Window design (if required)
Reinforcement design for large-surface boxes

For fragile items such as cookies, chocolates, or candies, we may design packaging solutions that include inner trays or partition structures. The filling process is also important. If the opening is too narrow or closing the lid requires too much force, a structural design intended for manual filling may not suit automated or semi-automated production lines.

Therefore, before ordering custom food tins, buyers should not only specify their desired appearance but also provide details regarding:

The product type, the filling method, and expected consumer opening and reuse patterns.

Structural Design Must Match the Product and Filling Method

When Ordering Custom Food Tins, Specify the Lid Structure and Closure Method

The lid is one of the most critical elements of the structural design, as it directly affects the opening experience, internal space, visual appeal, and reusability. Common lid types for custom food tin boxes include:

Slip lids
Plug-in lids
Hinged lids
Deep lids
Shallow lids

Each structure offers distinct functional characteristics. Slip lids suit decorative cookie or candy tins because they open easily. Deep lids enhance the visual cohesion between the lid and the tin body. Hinged lids, on the other hand, provide greater convenience for products that require frequent opening. In addition, the required lid fit must be clearly defined.

Therefore, we evaluate the relationship between lid depth, can body dimensions, forming tolerances, coating thickness, and the expected opening force. If the product is a food item requiring a high level of moisture or oxygen protection, the buyer should also confirm whether the metal lid is the primary barrier or whether the product will use inner seal bags, flexible packaging, liners, or individual packaging.

Confirming Design Artwork and Production Details

Once the tin box structure is finalized, the project moves to design artwork preparation and production approval. Print files are created based on the confirmed die line, as factors such as forming edges, lid overlaps, seams, embossing, and curved surfaces affect the design layout. Final production can begin only after both the structural and visual requirements are approved.

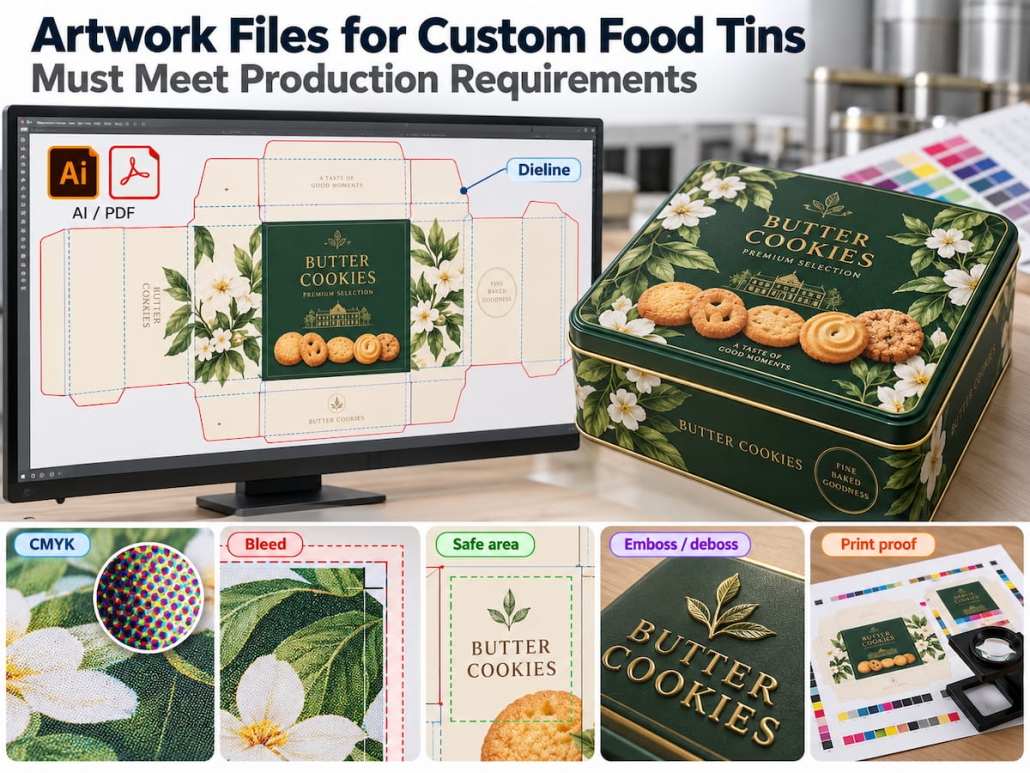
Artwork Files for Custom Food Tins Must Meet Production Requirements

For custom printing, we typically require editable vector artwork—not just low-resolution preview images—whenever possible. Preferred file formats generally include:

Adobe Illustrator files
Editable PDF files
Vector EPS files

High-resolution linked images, if necessary

The artwork should also clearly specify the following information:

  • CMYK or specified spot colors
  • Pantone color numbers when strict color matching is required
  • Logo placement
  • Text placement
  • Embossed or debossed areas
  • Matte or glossy areas
  • Metallic finish effects

Create artwork using the actual production die-cut lines provided or approved by the manufacturer. This is because the graphic design’s visual appearance may not perfectly match the final formed tin box. If designs are placed too close to flanges, rounded corners, embossed areas, or lid overlaps, they may look misaligned after forming.

Artwork Files for Custom Food Tins Must Meet Production Requirements

Comprehensive Pre-Production Approval Process

Before placing a bulk order, the client and manufacturer should confirm all specification requirements together, rather than approving details piecemeal.

At TSING, the final review typically covers the following 13 aspects:

Final dimensions of the tin box
Food capacity and product layout
Tinplate specifications
Body and lid structure
Internal trays or dividers
Lid fit
Design draft version
Print Colors
Surface Finish
Embossing or Debossing Effects
Packaging Method
Number of Units per Outer Carton
Approved Physical Sample or Production Sample

Therefore, when placing a bulk order for custom food tins, the most reliable process sequence is as follows:

Product Information → Internal Layout → Dimensions → Tin Structure → Lid Design → Inner Tray Requirements → Design Draft → Surface Finish → Final Approval → Mass Production

Confirming Design Details to Ensure Production Quality

Before placing a bulk order for custom food tins, buyers should confirm six key design details: finished dimensions, internal product layout, tin structure, lid type and fit, graphic design specifications, and surface treatment or decorative finishes. Finalize any requirements involving trays, dividers, embossing, special openings, or stacking features before mass production. For TSING, these details form the foundation for ensuring smooth progress on bulk food-tin orders. Only after confirming all of the above items can custom food tins proceed to mass production.

How Should Assorted Cookie Tin Packaging Be Designed

How Should Assorted Cookie Tin Packaging Be Designed?

At TSING, we design assorted cookie tin packaging using an “inside-out” approach—starting with the cookies themselves rather than the tin’s shape. We begin by confirming the number of cookie varieties, individual dimensions, fragility, surface coatings, packaging methods, and intended arrangement. Based on this, we determine the internal layout, divider or tray structure, number of layers, required headroom, tin dimensions, and lid configuration. Our goal is to prevent cookies of different sizes and textures from colliding, shifting, or damaging each other during transport, while ensuring the gift tin looks neat and orderly. Therefore, cookie tin design depends on a precise match between the internal structure and the actual cookie assortment—rather than selecting a standard tin first and then forcing the products to fit.

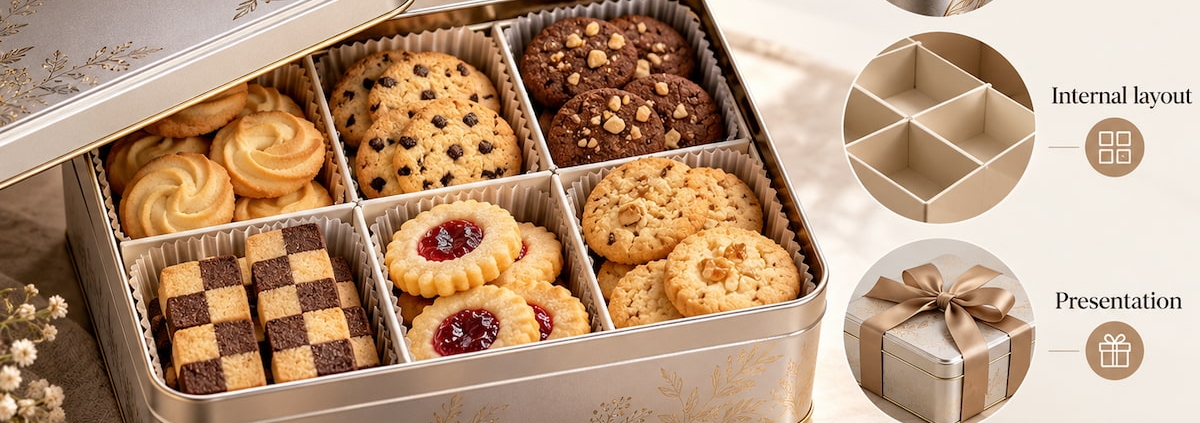
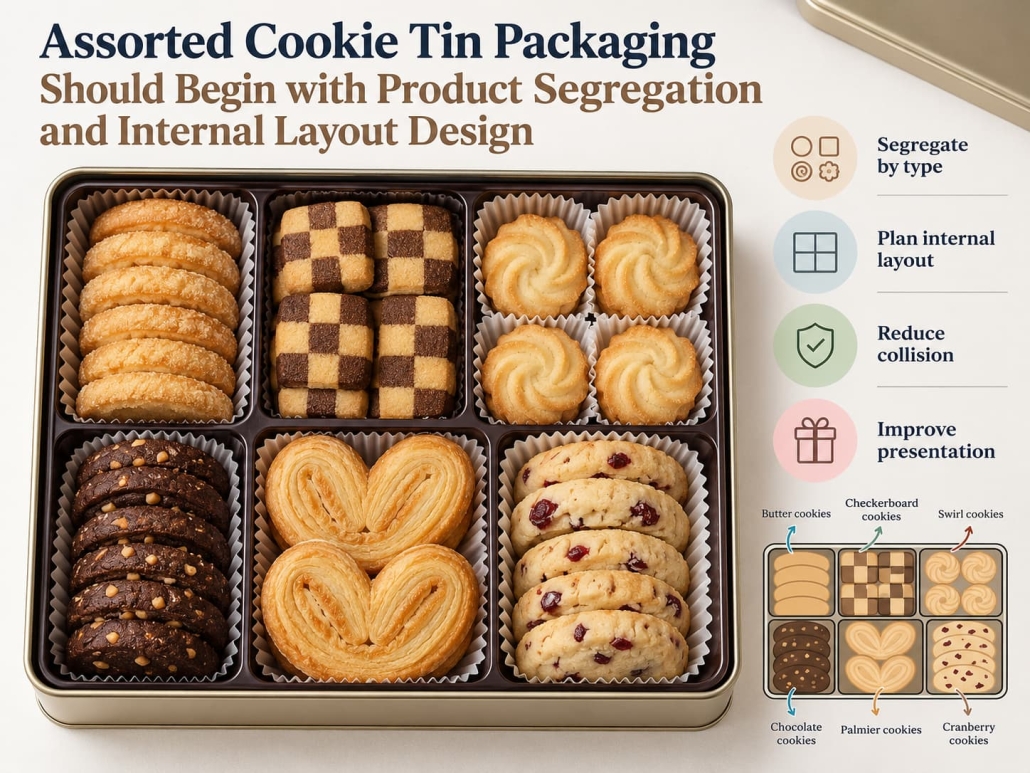
Assorted Cookie Tin Packaging Should Begin with Product Segregation and Internal Layout Design

The design challenges of assorted cookie tin packaging differ fundamentally from those of single-variety cookie packaging. Different products may vary in diameter, thickness, edge strength, surface decoration, and characteristics such as oil or moisture content. Therefore, TSING first reviews the assorted cookie mix to determine which cookies can safely share space and which ones need to stay separate. This internal layout forms the foundation for subsequent tin design, including divider types, compartment dimensions, layer heights, and the tin’s overall dimensions.

Assorted Cookie Tin Packaging Should Begin with Product Segregation and Internal Layout Design

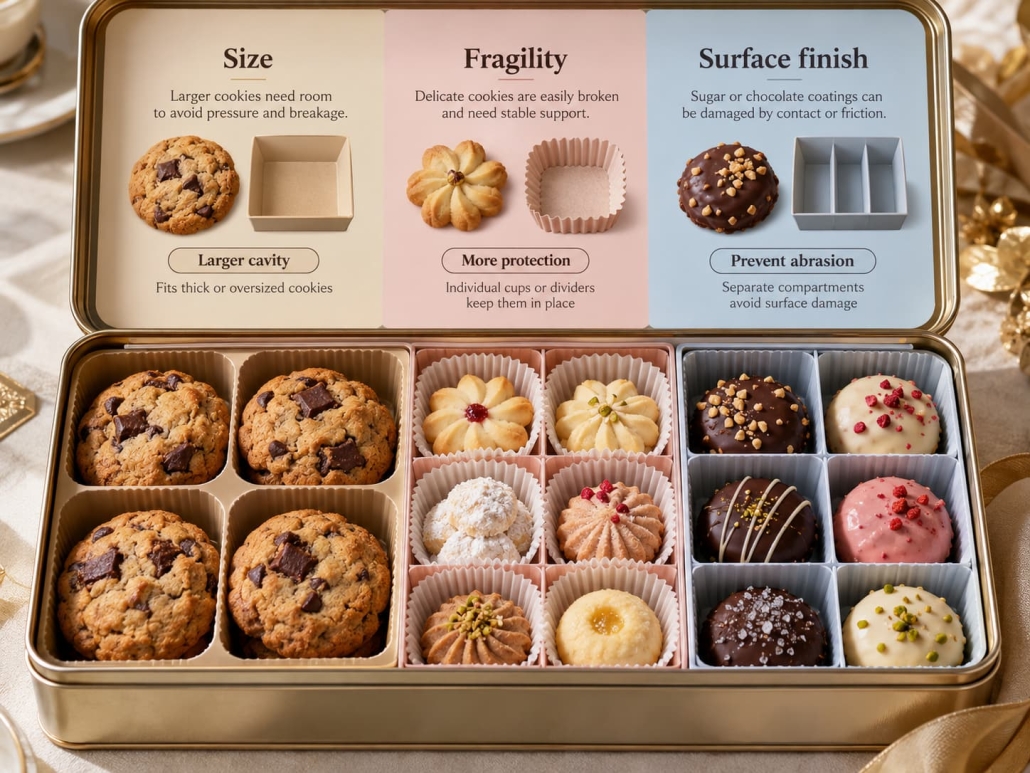
Compartmentalizing Assorted Cookie Tin Packaging Based on Size, Fragility, and Surface Characteristics

Butter cookies, chocolate-coated cookies, filled cookies, and thin wafer cookies react differently to vibration and impact. Harder cookies may damage more fragile ones; meanwhile, surfaces with chocolate coatings or icing decorations may develop scratches or wear marks if repeatedly rubbed against adjacent products. Before finalizing the internal structure, TSING typically confirms the following information:

  • The diameter, length, and width of the cookies
  • The thickness of the cookies
  • The quantity of each variety
  • Any surface coatings or decorations on the tin
  • Whether the cookies are individually wrapped
  • Expected shipping conditions

The primary objective is to establish a clear product placement plan. The best layout for assorted cookie tins is to divide the interior space into two zones or create separate compartments based on the dimensions of the different cookie varieties.

Compartmentalizing Assorted Cookie Tin Packaging Based on Size, Fragility, and Surface Characteristics

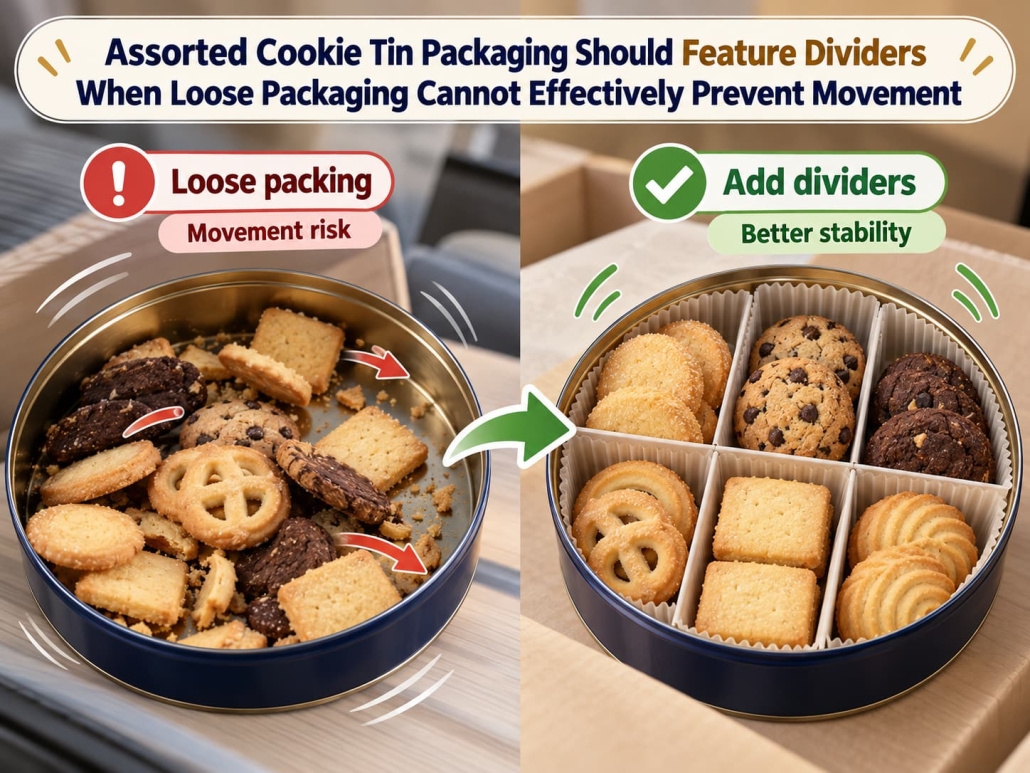
Assorted Cookie Tin Packaging Should Feature Dividers When Loose Packaging Cannot Effectively Prevent Movement

Dividers are particularly useful when assorted cookies include products with different shapes, fragile edges, decorated surfaces, or those that need to remain visually distinct. However, not all assorted cookie tin packaging projects require the same divider design.

TSING offers several common internal configurations:

  • Cardboard dividers: Used to separate larger groups of products
  • Molded plastic trays: Used for precise single-item positioning
  • Paper cups: Suitable for cookies or candies that require individual display
  • Spacers: Used to separate stacked rows
  • Custom molded inserts: Suitable for irregularly shaped or premium assorted combinations

Cardboard dividers work well when the main goal is to keep different cookie groups from bumping into each other or getting mixed up. Molded trays provide tighter positioning control. These trays are typically better for fragile cookies, high-end products, or items that need to be displayed in a fixed arrangement. Individual paper cups separate products and create a traditional candy-style display effect, but they don’t provide as much structural stability as form-fit cavity trays.

When selecting dividers, also consider the tin’s dimensions. If the dividers leave too much space around the cookies, the products may still shift within the individual compartments.

Assorted Cookie Tin Packaging Should Feature Dividers When Loose Packaging Cannot Effectively Prevent Movement

Minimize the Number of Layers as Much as Possible While Meeting Protection and Display Requirements

No universal “optimal” number of layers exists for assorted cookie tin packaging. In most cases, the right number of layers depends on cookie thickness, total quantity, fragility, tin height, and how consumers are expected to open and consume the product.

A single-layer design offers the best visual presentation. It also minimizes the vertical pressure exerted on the cookies. However, for larger quantities, a single-layer design requires more floor space in the tin.

A two-layer design can improve space utilization, provided that the upper and lower layers are properly separated. TSING may use rigid divider panels, trays, or cardboard dividers to prevent the upper layer of cookies from pressing directly onto the products below.

While a three-layer or multi-layer structure can increase loading capacity, it also adds challenges, including increased packaging height, greater vertical load-bearing stress, and difficulty accessing cookies from the bottom layer.

For high-end assorted cookie tins, rather than simply maximizing the number of cookies in a deep tin, a well-designed one- or two-layer structure often better balances display appeal, load capacity, and product protection.

Packaging Design for Assorted Cookie Tins Must Balance Dimensions and Production Feasibility

Once TSING finalizes the cookie arrangement, divider structure, and number of layers, it can determine the tin box’s final dimensions and structural details more precisely. At this stage, TSING shifts from layout planning to ensuring the entire package can be produced reliably and perform as required during filling, transportation, and retail display.

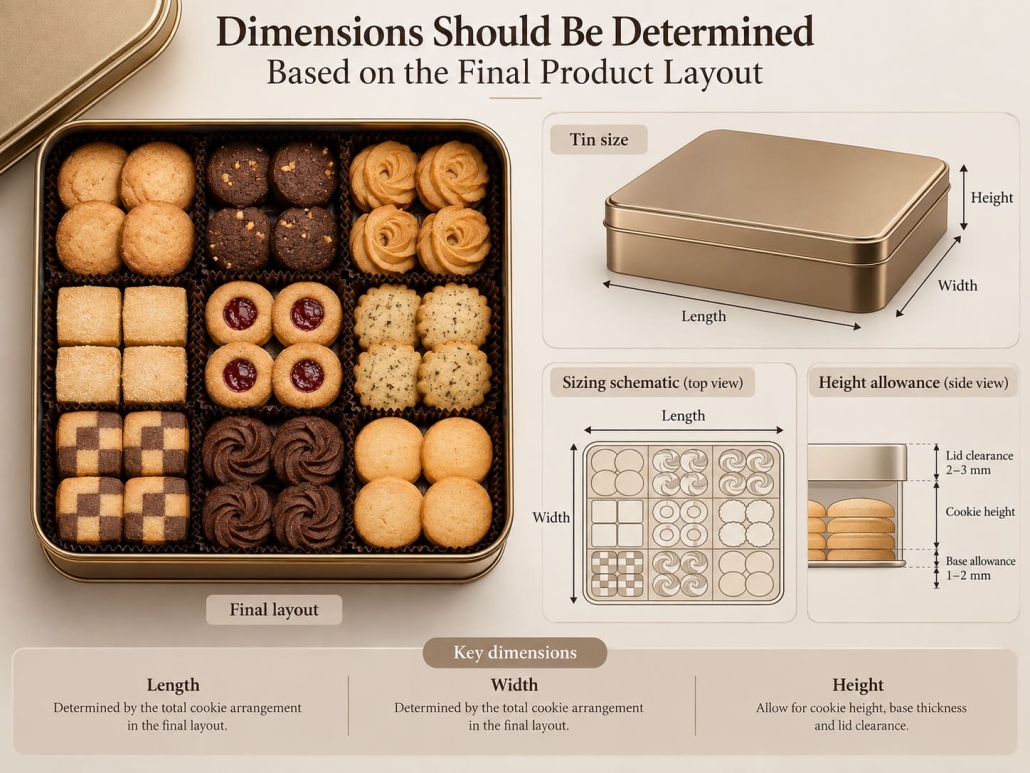
Dimensions Should Be Determined Based on the Final Product Layout

Calculate the tin’s external dimensions based on the final internal layout, rather than selecting them independently. Key design considerations include:

  1. Total floor area occupied by the cookies
  2. Divider thickness
  3. Tray dimensions
  4. Clearance around the liner
  5. Number of layers
  6. Thickness of divider spacers
  7. Headroom (clearance at the top)
  8. Lid insertion depth

If the tin is too large, it creates unnecessary gaps that allow the liner or cookies to shift. If it is too small, it can compress the cookies, deform the dividers, or cause the lid to press against the top layer. The design of cookie tins must also ensure structural rigidity. For large, shallow tin boxes, you may need to reduce surface deformation by adjusting tinplate thickness, optimizing edge and corner geometry, setting an appropriate lid depth, or adding reinforcing ribs.

Dimensions Should Be Determined Based on the Final Product Layout

Creating a Well-Designed Assorted Cookie Tin Packaging

High-quality packaging for assorted cookies should match the specific cookie mix instead of relying on standard tin box dimensions. TSING first classifies the cookies by size, fragility, surface texture, and packaging method, then determines whether the package needs dividers, trays, paper cups, or interlayer spacers. When setting the number of layers, we strive to keep the design as streamlined as possible while meeting capacity requirements; for high-end assorted cookie gift boxes, we typically use a stable, one- or two-layer layout that provides better protection while presenting a more refined visual appearance.

The final tin dimensions must account for cookie size, divider thickness, internal clearance, headroom, and lid insertion depth.

The design process is as follows:

Cookie type and size → Separation method → Selection of dividers or trays → Number of layers → Internal clearance → Tin dimensions → Lid structure → Testing of the finished packaging

A well-designed assorted cookie tin should keep each cookie securely in place, prevent fragile varieties from colliding and breaking, avoid excessive vertical pressure, and ensure a neat, orderly visual presentation when opened.

How Is the Interlocking Structure of Stackable Tea Tins Designed

How Is the Interlocking Structure of Stackable Tea Tins Designed?

The interlocking structure of stackable tea tins treats each layer as part of a unified mechanical system rather than an independent container. We first determine the tea-tin diameter, number of layers, fill weight, opening mechanism, and required stacking height. Next, we design the geometric fit between the upper and lower cans, including shoulder positioning, bottom grooves, contact surfaces, and gaps between adjacent layers. During the design process, TSING evaluates connection stability, separation force, wobble, dimensional consistency, and molding tolerances before prototyping. Therefore, a successful stackable tea tins design must achieve three objectives simultaneously: precise alignment, stable stacking, and easy separation during daily use.

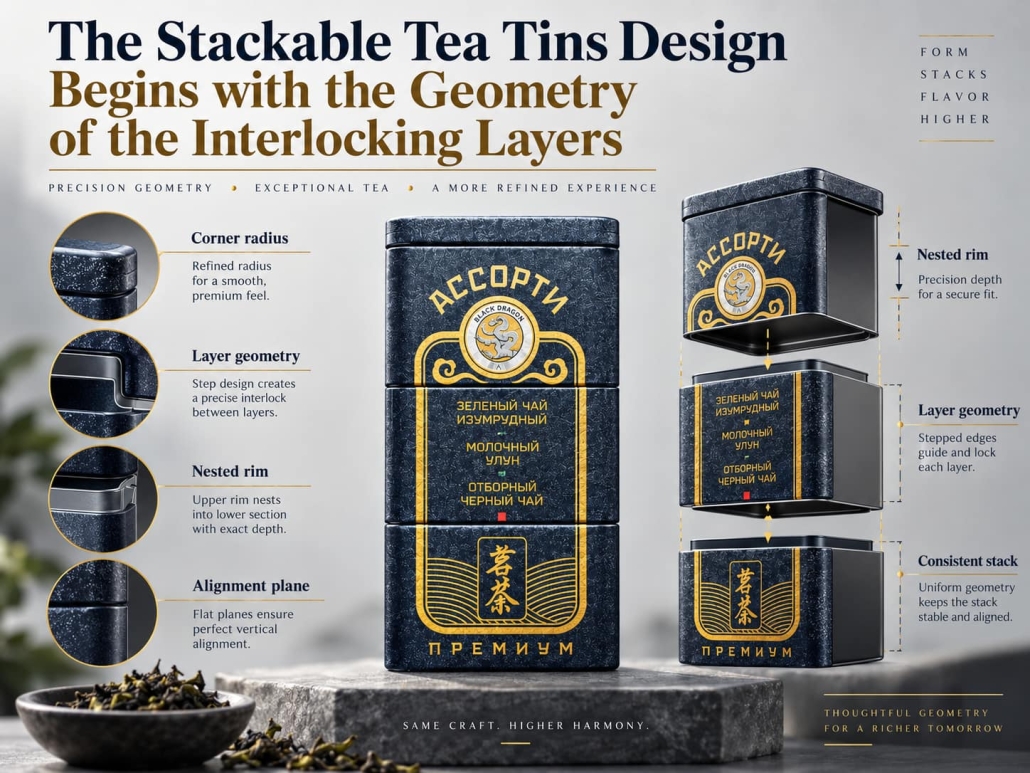
The Stackable Tea Tins Design Begins with the Geometry of the Interlocking Layers

The basic function of an interlocking tea tin structure is simple: the upper container must sit precisely on the lower container without sliding arbitrarily or becoming difficult to separate. To achieve this consistently, the mating surfaces of the upper and lower containers must be designed as a single unit. Therefore, TSING develops the connection-point geometry before finalizing decorative embossing, printing, or other non-functional details.The Stackable Tea Tins Design Begins with the Geometry of the Interlocking Layers

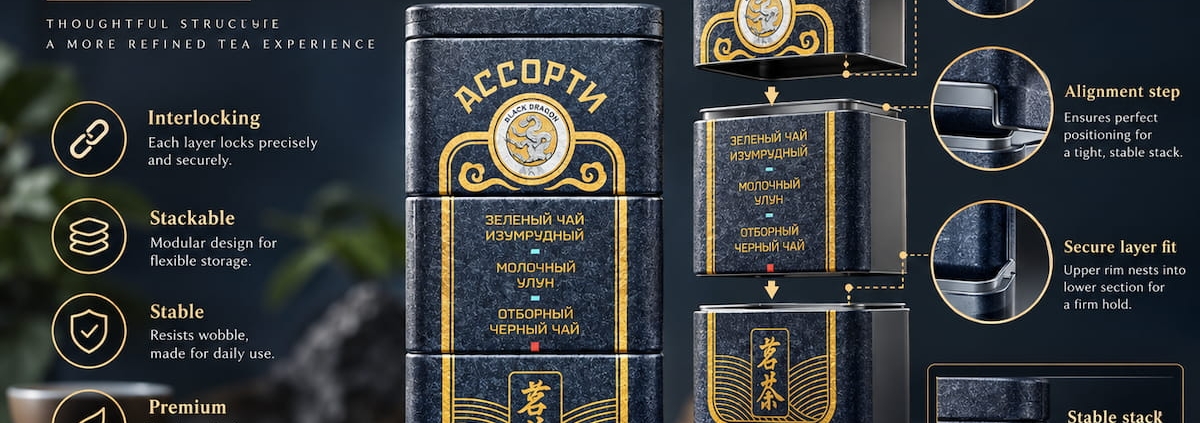
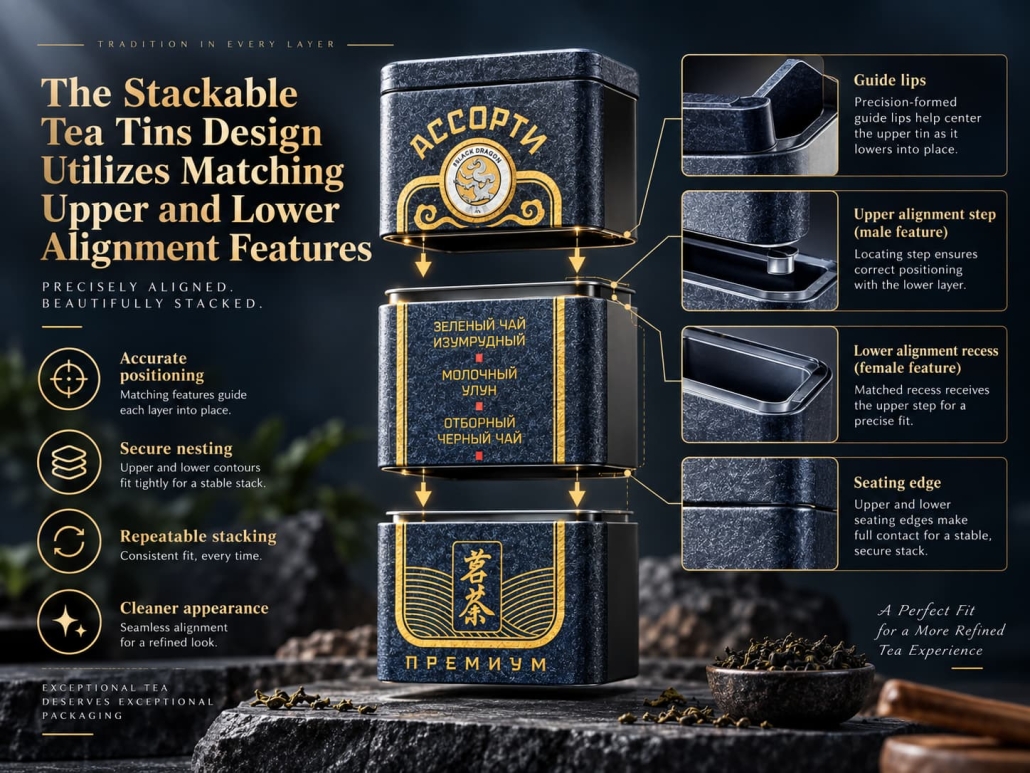
The Stackable Tea Tins Design Utilizes Matching Upper and Lower Alignment Features

The connection between layers of stackable tea tins typically relies on complementary structural features rather than flat contact surfaces alone.

Common structural design elements include:

  • A raised alignment shoulder around the top of the lower tea can
  • A matching recessed area on the bottom of the upper tea can
  • Controlled peripheral contact surfaces
  • A specific insertion depth that restricts lateral movement

When an upper tea tin is placed on a lower unit, the bottom groove engages the positioning features below. This design ensures consistent alignment and prevents the cans from sliding against one another. For round tea tins, the positioning features can take the form of a continuous circular contour. For square or rectangular stackable tea tins, corner rounding radii and straight-wall alignment are critical.

TSING also considers the disassembly method. Stackable structures do not necessarily need to operate like “snap-fit” closures. In many tea packaging applications, a better solution is a “controlled positioning fit”: one that ensures stable alignment during handling while allowing consumers to remove a layer effortlessly.

The Stackable Tea Tins Design Utilizes Matching Upper and Lower Alignment Features

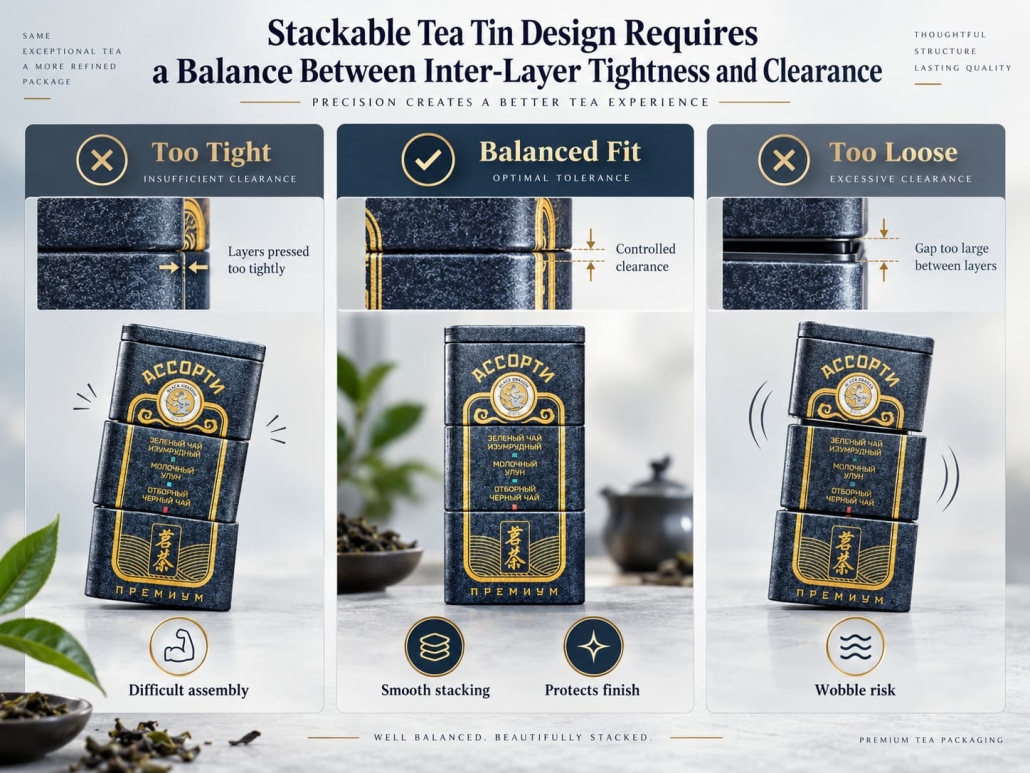
Stackable Tea Tin Design Requires a Balance Between Inter-Layer Tightness and Clearance

The fit between layers is one of the most critical aspects of the entire structure.

If the interlocking areas are too loose, the upper tea can may shift laterally, resulting in noise, misalignment, and unstable stacking. If they are too tight, users may need to pull or twist with force to separate the layers; furthermore, normal manufacturing tolerances may make the fit noticeably tighter on some products than others.

Therefore, TSING has designed controlled clearances between mating surfaces rather than using zero-clearance connections. The required fit depends on various factors, including tinplate thickness, diameter or overall footprint, the depth of the positioning structure, forming processes, surface coatings, and printing, among others. Contact-area design is also crucial. When designing stackable tea tins, TSING evaluates these variables comprehensively rather than adjusting a single dimension.

For multi-layer tea can packaging, our design goal is to achieve a structure that provides both reliable positioning and a smooth sliding fit—avoiding both uncontrolled loose stacking and unnecessary forceful mechanical locking.

Stackable Tea Tin Design Requires a Balance Between Inter-Layer Tightness and Clearance

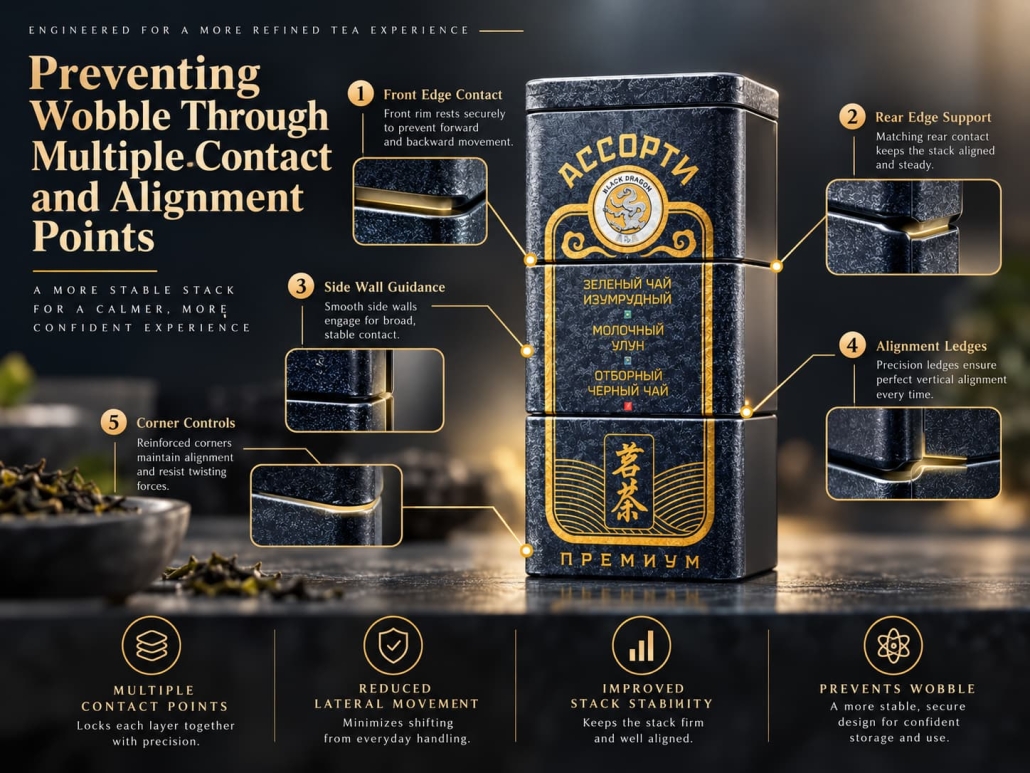
Preventing Wobble Through Multiple Contact and Alignment Points

Wobble typically stems from excessive radial clearance, insufficient insertion depth, uneven contact surfaces, or accumulated dimensional deviations. Therefore, simply increasing the fit tightness is insufficient to achieve stable stacking. TSING first verifies that the upper container is positioned on a clearly defined support surface. Loads should be transferred through predetermined structural areas, rather than through random contact points caused by deformation or uneven molding.

We pay attention to the following design details to enhance stability:

Adequate positioning depth between layers
Uniform support around the mating edges
Controlled radial clearance
A flat and rigid base plate
Symmetrical molding at the stacking interfaces
Appropriate corner radius for non-circular containers
Sufficient structural rigidity for the anticipated load weight

For stackable containers, reducing wobble requires a careful consideration of interlocking geometry, panel rigidity, dimensional consistency, and overall packaging proportions.

Preventing Wobble Through Multiple Contact and Alignment Points

The Stackable Tea Tins Design Requires Strict Control of Manufacturing Tolerances and Validation

Even if the structure appears flawless on 3D drawings, actual performance may still be inconsistent if critical fit dimensions change during the forming process. Processes such as cutting, stamping, flanging, can body forming, seaming, coating, and tinplate assembly all introduce normal manufacturing deviations. Therefore, TSING clearly identifies the key dimensions that directly determine interlocking performance and controls them strictly.

The Quality of an Interlocking Structure Design Depends on the Control of Key Fitting Dimensions

Not all tea can dimensions require the same level of strict control. For interlocking structures, the most critical dimensions typically include the following:

  1. Outer diameter of the positioning shoulder
  2. Inner diameter of the mating groove
  3. Engagement depth
  4. The height of the support step
  5. The flatness of the can bottom
  6. The roundness of the lid or body of a cylindrical can

These dimensions determine whether products from different batches can maintain a stable fit between layers when stacked. TSING also considers the cumulative effect of tolerances. A minor deviation in a single component may fall within acceptable limits. Still, if multiple deviations accumulate in the same direction, the stack may become too loose or too tight. For example:

Forming deviation + coating thickness + can bottom deformation + positioning feature deviation = actual interlocking fit

For this reason, stackable tea tin design cannot rely solely on nominal CAD dimensions; it must also incorporate mold capabilities and the characteristics of tinplate after forming. Determine specific tolerance values based on can dimensions, geometry, material thickness, mold processes, and production equipment.

Comprehensive Design of Interlocking Structures for Stackable Tea Tins

Tea capacity and number of layers → Determination of container dimensions → Design of interlocking geometry → Setting of positioning depth and clearance → Structural support design → Mold design → Prototype molding → Multi-layer fit testing → Tolerance adjustment → Mass production validation

At TSING, this process ensures stackable tea tins are more than containers you can stack on top of one another. A well-designed stackable tea tin ensures precise alignment between layers, minimizes wobble, maintains an appropriate separation force, and consistently delivers the same stacking performance throughout mass production.

How Can Custom Metal Food Tins Be Designed for Premium Confectionery Packaging

How Can Custom Metal Food Tins Be Designed for Premium Confectionery Packaging?

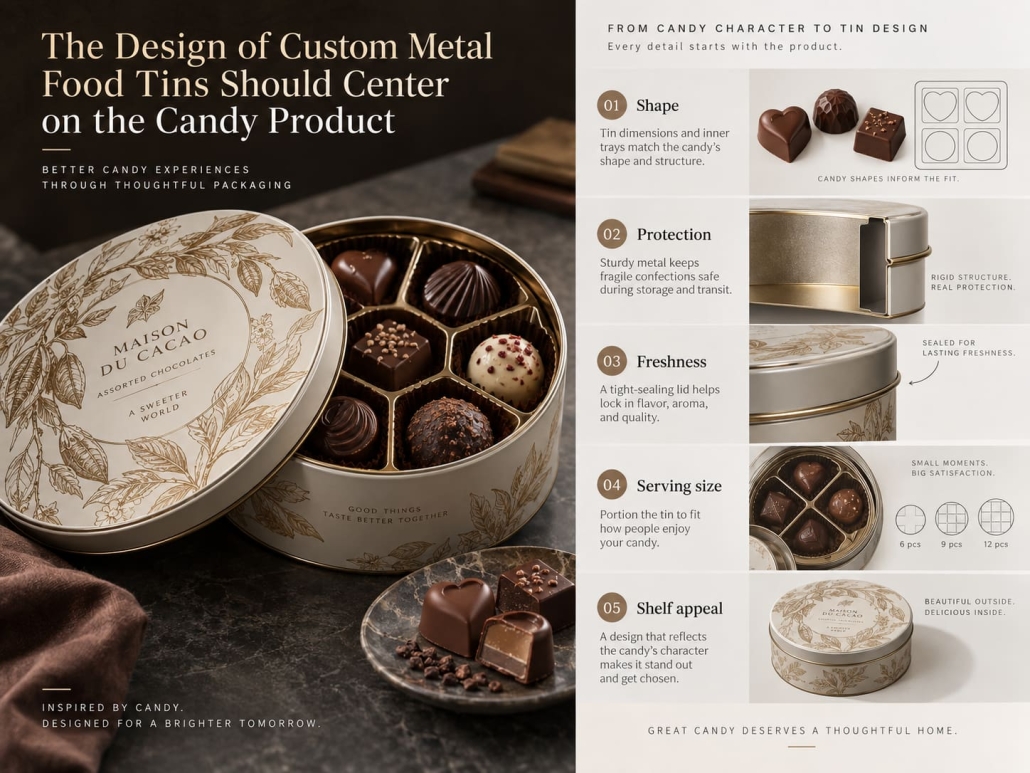
When designing custom metal food tins for premium confections, the first consideration must be the product’s characteristics: size, shape, fragility, arrangement, shelf-life requirements, and the desired retail display effect. At TSING, we begin by planning the layout of chocolates, candies, truffles, or other confectionery products within the tin, and then determine the required dimensions, lid structure, inner tray design, surface finishes, printing methods, and decorative details.

High-end packaging cannot be achieved simply by adding a metallic finish or embossed effect; the tin must protect the confections, ensure an orderly product display, and consistently deliver the brand’s intended visual identity during mass production. Therefore, TSING employs a standardized process to advance every project, covering every stage from product layout planning and structural design to visual presentation, prototype evaluation, and production validation.

The Design of Custom Metal Food Tins Should Center on the Candy Product

High-quality candy packaging must balance aesthetics with product protection. Before choosing printing effects, embossing techniques, or decorative finishes, TSING first plans the candy’s arrangement, the required internal space, and the structural features needed to keep the product secure. These decisions determine the candy tin’s available dimensions and lay the foundation for the subsequent custom candy tin design.

The Design of Custom Metal Food Tins Should Center on the Candy Product

The Design of Custom Metal Food Tins Should Begin with the Candy Layout

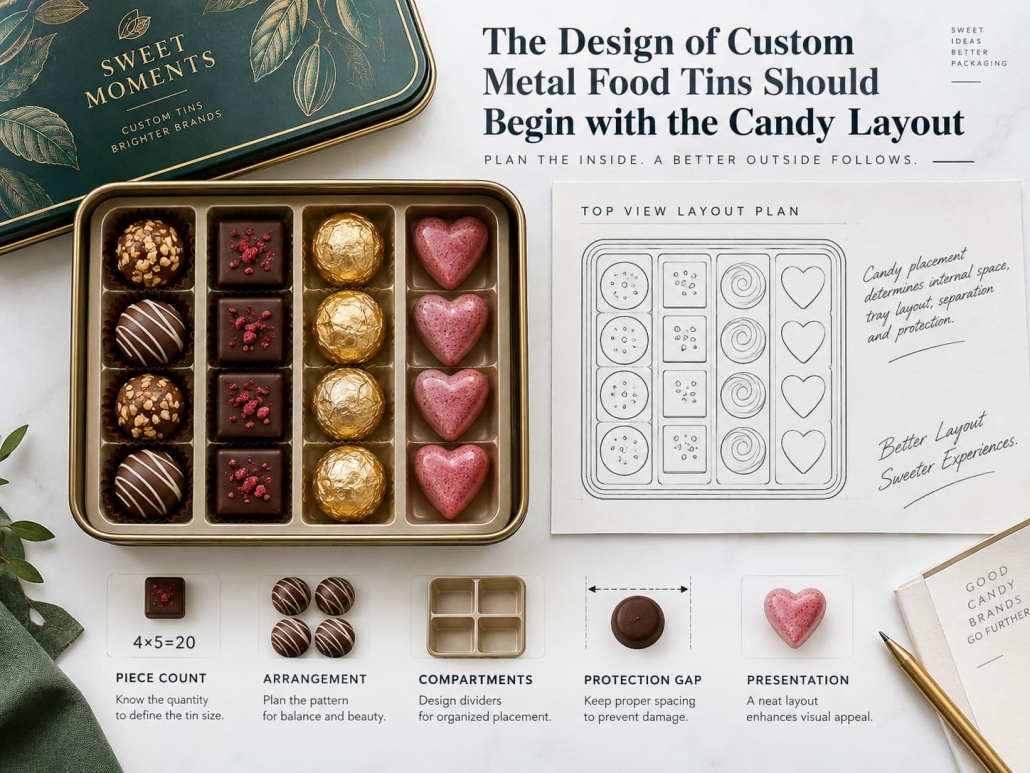
The internal product layout is a primary consideration in the design process, as it directly determines the can’s dimensions, the inner tray design, the opening size, and the final display effect.

TSING typically asks clients to provide information such as the dimensions of individual candies, the number of pieces per can, and product shapes. Common internal solutions we offer include molded plastic trays, cardboard inserts, individual paper cups, tiered dividers, or custom grooves.

For high-end confections such as premium chocolates or truffles, the arrangement layout is critical. If the packaging is too loose, products may shift during transit, causing surface damage, peeling decorations, or a disorganized display. Our design objective is not merely to fill the available space, but to create appropriate spacing that ensures the candies are easy to access while preventing excessive shaking or shifting during transport.

The Design of Custom Metal Food Tins Should Begin with the Candy Layout

Dimensions and Structure of Custom Metal Food Tins

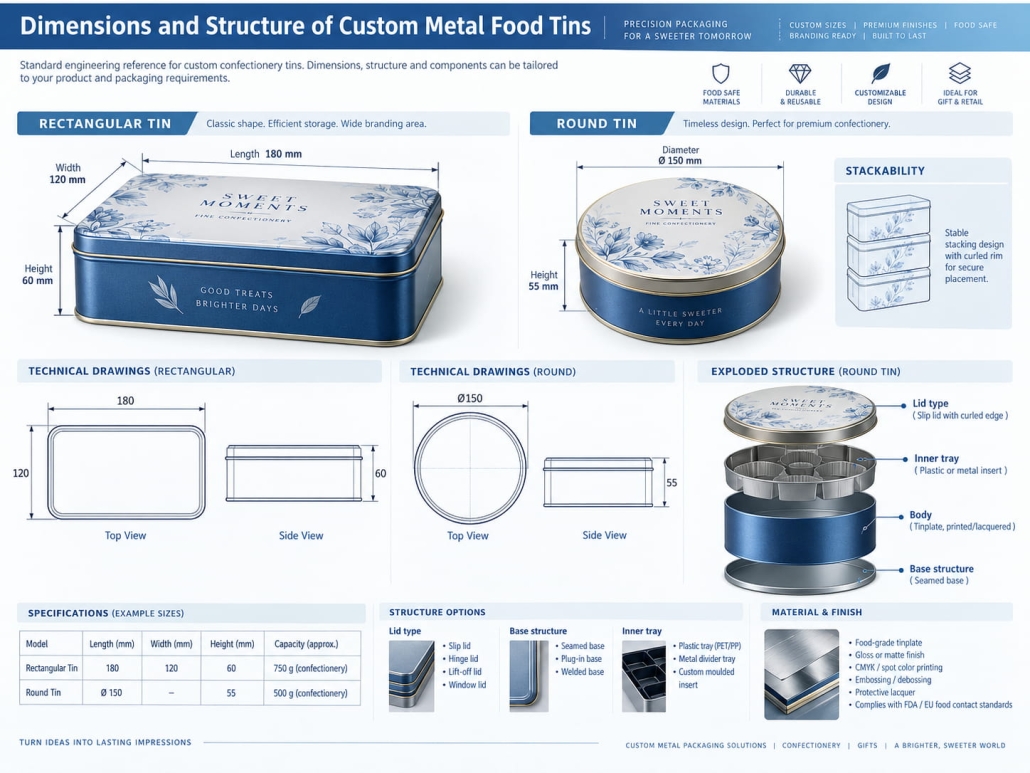
High-end confectionery packaging must reserve sufficient internal space for the product and inner tray while avoiding unnecessary gaps. Excessive gaps can cause the product to shift, while insufficient space may squeeze the chocolates, damage decorative ingredients, or prevent the lid from closing properly. After determining the arrangement of the confections, TSING will define the metal tin’s external dimensions and structural design.

Key structural factors include:

  1. The can’s length, width, height, or diameter
  2. Required internal headspace (top clearance)
  3. Inner tray thickness
  4. Lid depth
  5. Tinplate thickness
  6. Bottom rigidity
  7. Stacking stability

For custom candy tins used as gift packaging, TSING also considers their practical value after the candy has been consumed. A metal tin with a sturdy structure, a smooth-closing lid, and durable decorations adds value to the packaging that extends beyond the food itself.

Dimensions and Structure of Custom Metal Food Tins

Achieving a High-End Aesthetic Through Surface Design and Production Testing

Once the basic packaging structure is finalized, TSING moves on to designing and developing the exterior surface treatment. This phase encompasses printing, metallic finishes, matte or glossy finishes, embossing, and other decorative techniques. These elements must align with the brand’s design philosophy and the can’s shape, and TSING validates them through physical prototyping before mass production.

Custom Food Tins Feature Surface Finishes That Complement the Brand

No single finish automatically gives custom metal food tin a premium feel. The appropriate finish depends on the design motif, brand image, product category, and the desired retail display effect.

We offer the following common finish options:

  • White Magnetic +4C
  • White Ink +4c
  • Pantone
  • Gloss Silver
  • Gloss Gold
  • UV+Matte
  • Explosion Ink
  • Rubber Varnish
  • PearlInk

Consider decorative effects alongside the printing process’s characteristics. Print quality for fine text, color gradients, metallic areas, and dark solid color blocks on tinplate often differs from that on cardboard. Therefore, before finalizing a custom candy tin design, TSING will evaluate the draft based on the actual metal substrate.

Custom Food Tins Feature Surface Finishes That Complement the Brand

Embossing Enhances Design Impact

Embossing can enhance the premium feel of candy tin packaging, but it should be used selectively. Areas suitable for embossing include:

  • Brand logos
  • Product names
  • Decorative borders
  • Central design elements
  • Localized three-dimensional patterns

However, not all design elements suit embossing. When developing custom metal food tins, we evaluate the relationship between the embossing process, design patterns, and the structural forming process. For many high-end custom candy tins, a minimalist embossed logo or central brand motif often yields better results than covering the entire lid with embossed details.

Prototyping and Validation Should Be Conducted Before Mass Production

Evaluate the final design as actual packaging, not just renderings. TSING uses prototyping to validate the combined effects of structural design, product layout, printing, surface treatment, and decorative details.

Standard inspection items include:

  • Fit between the product and the inner tray
  • Smoothness of lid opening and closing
  • Internal headroom
  • Alignment accuracy of printed and embossed patterns
  • Consistency of surface finishes

During validation, we use actual candies or dimensionally accurate mock-ups whenever possible. This validation phase ensures that TSING can refine the design of custom candy tins before mass production begins.

Providing Comprehensive Custom Candy Packaging Design

When designing custom metal food tins for high-end candy packaging, we follow this design process:
Candy dimensions → Product layout → Tin dimensions → Internal support structure → Lid and overall structure → Graphic design → Surface treatment → Embossing (if required) → Prototyping → Product fit verification → Mass production

We follow this process because high-end candy packaging must balance visual appeal with physical functionality. We believe that the finest custom metal food tins are not merely decorative containers, but rather packaging designs meticulously crafted around the candy itself, its presentation, the brand image, and the requirements for repeatable production.

How Is a New Mold Developed for Custom Food Tins

How Is a New Mold Developed for Custom Food Tins?

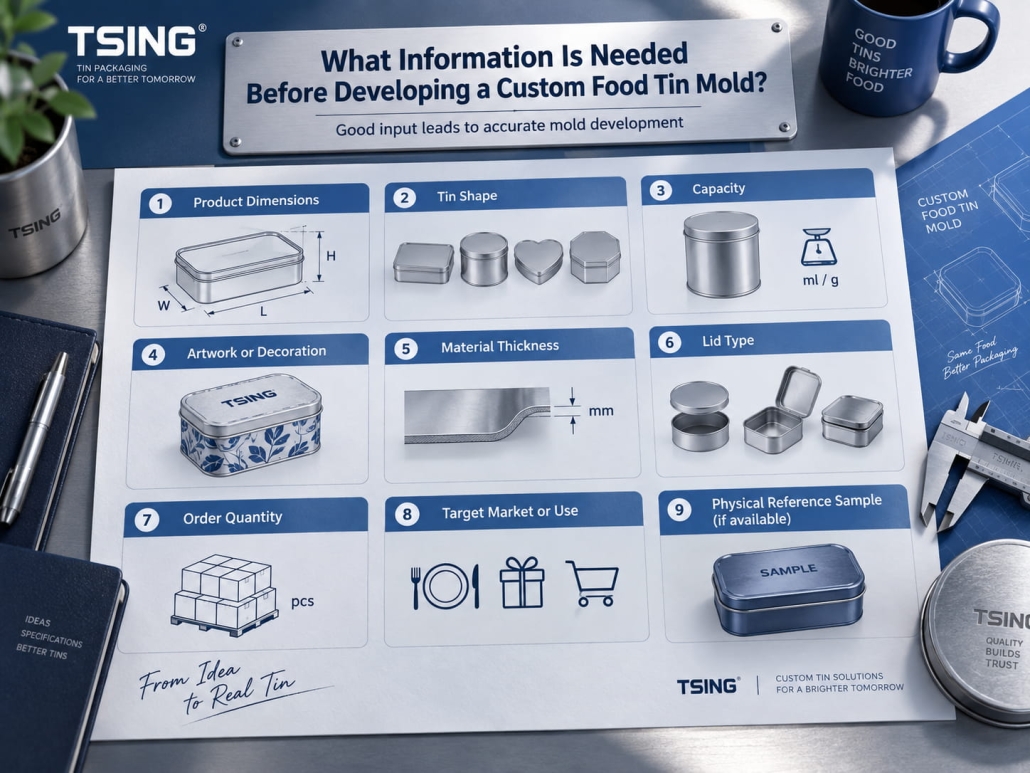
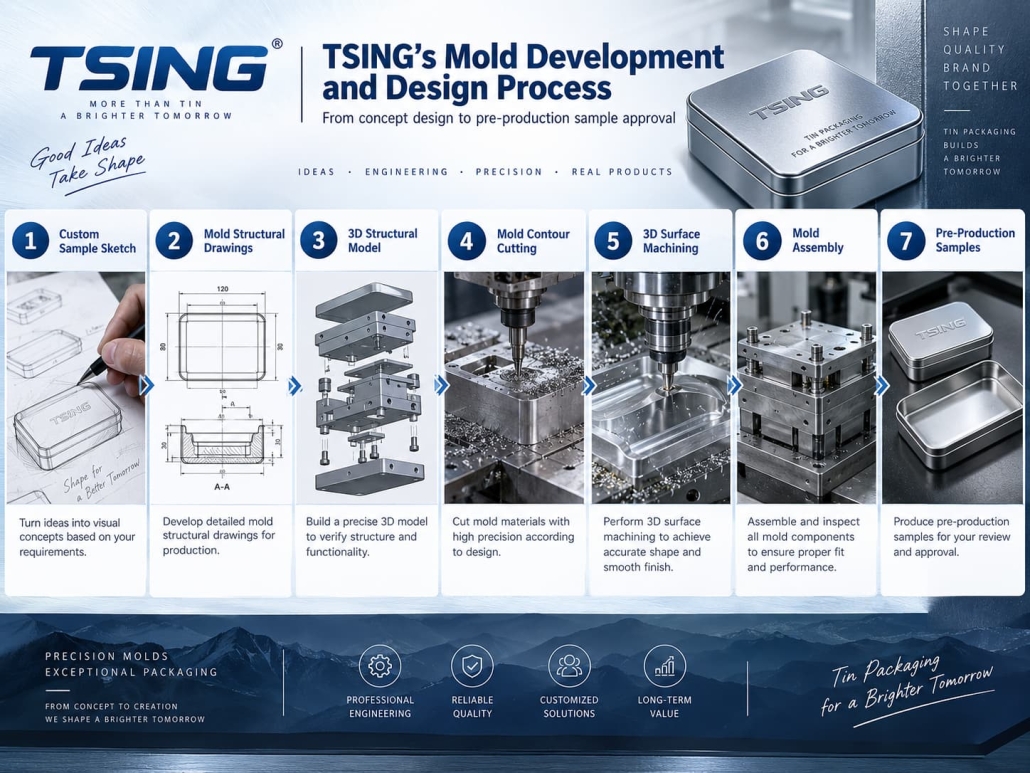
Developing new molds for custom food tins starts with the product, not the mold-making process. At TSING, we first confirm the tin’s required dimensions, shape, lid structure, intended food use, internal layout, and exterior decorative details. We then translate the approved design concept into seven stages:

Custom Sample Drawing → Mold Structure Drawing → 3D Structural Drawing → Mold Contour Cutting → 3D Surface Forming → Mold Assembly → Pre-Production Prototyping

Before the mold goes into production, each stage verifies different aspects of the design. This systematic process enables TSING to identify issues related to dimensions, forming, sealing, and appearance early on, reducing unnecessary mold modifications and helping clients turn custom packaging concepts into food tins with stable performance ready for mass production.

Determining Product and Mold Design Requirements for Custom Food Tins

Before developing a new mold for custom food tins, we must determine whether a new mold is necessary and clearly define the packaging requirements it must meet. Mold development should not begin with machining; it should start with an assessment of the tin’s dimensions, shape, sealing structure, internal product layout, and existing mold resources. Once we clarify these requirements, we can decide whether to modify an existing mold or develop a completely new one. Next steps include gathering accurate product and packaging information, translating relevant requirements into feasible tin mold design solutions, and then moving through the full custom food tin mold development and design process—from creating structural drawings to mold manufacturing and sample validation.

Determining Product and Mold Design Requirements for Custom Food Tins

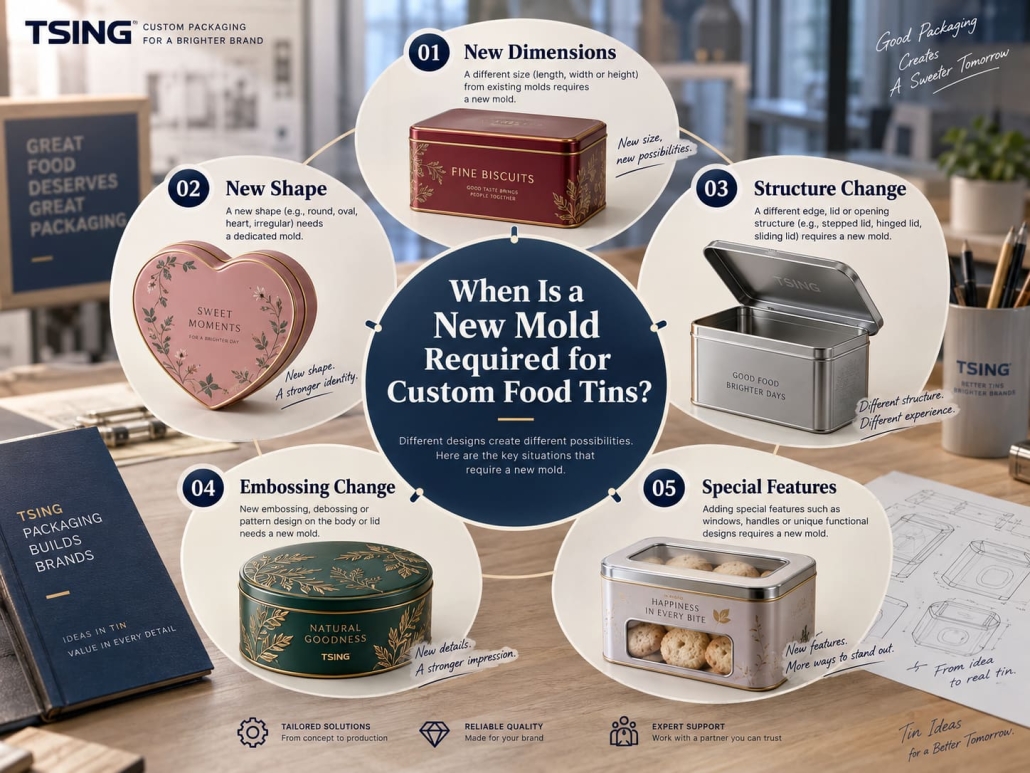
When Is a New Mold Required for Custom Food Tins?

You need a new mold when existing production molds cannot achieve the desired shape, dimensions, structure, or functional details of the tin. For many custom food tin boxes, simply changing the printed design does not require a new mold. If a customer selects a round, rectangular, square, or irregular shape from the mold library, we can typically use the existing structure directly for design and prototyping.

However, if a customer requests structural changes, we must create a new mold. Examples include:

  • Completely new dimensions for length, width, height, or diameter
  • Unique lid or base contours
  • Custom embossing or three-dimensional shapes
  • Unique shoulders, curved side walls, rounded corners, or stepped structures
  • Closed structures that cannot be produced using existing molds

Therefore, the decision to create a new mold should be based on geometric shapes and forming-process requirements, not solely on whether the packaging appearance is a custom design.

During the mold development and design phase for custom food tins, TSING first compares the customer’s requested packaging specifications with existing molds before recommending a new mold. This helps avoid unnecessary mold costs for the client, especially when existing, proven designs already meet the packaging requirements.

When Is a New Mold Required for Custom Food Tins

What Information Is Needed Before Developing a Custom Food Tin Mold?

Mold development accuracy depends on the precision of the product information. We cannot begin designing a tin mold based solely on visual reference images.

Before initiating the engineering design process, we typically need to confirm details such as the required dimensions and shape of the finished tin box, as well as the desired lid structure. For food products, the contents themselves often determine the critical dimensions. For example, a cookie tin design must account for the cookies’ diameter, thickness, arrangement, tray layout, and required headspace. Even if tea tins and candy boxes look similar, their opening dimensions or internal volume requirements may differ completely.

Providing images of custom samples is usually the first practical step. This helps us understand the client’s expectations for the tin’s appearance and proportions before detailed engineering design begins.

What Information Is Needed Before Developing a Custom Food Tin Mold

TSING’s Mold Development and Design Process

After confirming the structure and requirements, we follow the process below to develop the mold, rather than proceeding directly to the metal-cutting stage. This process typically consists of seven stages.

1. Custom Sample Sketch:
The project begins with a visual rendering of the desired tin box. This helps confirm the overall shape, proportions, lid style, and key aesthetic features.

2. Mold Structural Drawings:
The visual concept is translated into structural mold drawings. At this stage, TSING evaluates the manufacturing methods for the tin box body, lid, base, edges, and forming areas.

3. 3D Structural Model:
A 3D structural model is then created to evaluate the geometry more precisely. This stage helps identify interference issues, improper proportions, forming limitations, and assembly risks before manufacturing the physical mold.

4. Mold Contour Cutting:
Once the structural design is approved, the mold components are cut according to the engineering specifications. The precision of this stage directly affects the consistency of the finished tin box.

5. 3D Surface Machining:
If the design includes curved surfaces, irregular contours, or three-dimensional features, the mold will be machined accordingly to accurately reproduce these forms.

6. Mold Assembly:
The team assembles and inspects mold components as a complete system. Before trial production, verify alignment, forming positions, and fit between mold components.

7. Pre-Production Samples:
The manufacturer produces physical samples using the assembled mold. Before formal mass production begins, the customer and manufacturer can inspect the actual tin cans.

TSING's Mold Development and Design Process

Newly Developed Molds Must Undergo Validation Before Entering Mass Production

Completing mold fabrication does not mean custom food tins are immediately ready for mass production. Before we use the mold for large-scale manufacturing, we must validate it to ensure the tins meet the specified dimensions, structure, sealing performance, and product-fit requirements. This validation phase is critical because even minor deviations—such as lid fit, inner tray positioning, formed edges, or internal clearances—can cause issues during filling or mass production. Therefore, we use prototype samples to verify both appearance and functional performance and make any necessary adjustments before final approval.

How to Test Prototypes of Custom Food Tins?

Even if a prototype resembles the original design drawings, it does not guarantee approval. We evaluate samples as functional packaging; depending on the design, the prototype review may cover finished dimensions, the fit between the lid and body, and the smoothness of the opening and closing mechanism.

When testing prototypes, we place actual food items or dimensionally accurate substitutes inside the box whenever possible. For example, even if a prototype meets the external drawing requirements, modifications may still be necessary if the inner tray sits too high and prevents the lid from closing properly. Similarly, while the lid may look correct externally, it may turn out too loose or too tight after actual molding.

Therefore, prototype testing closely links the tin mold design with actual packaging performance.

Does Developing a New Mold Affect the Lead Time for Custom Tins?

Developing a new mold increases the initial time investment, as it must undergo multiple engineering design and validation stages before formal production can begin. For projects using existing molds, you can usually move directly to pattern design, prepress preparation, and production prototyping; new mold projects must first complete steps such as structural confirmation, mold drawing preparation, 3D modeling, machining, mold assembly, trial molding, and sample approval.

Therefore, the delivery process for new mold projects involving custom food tin boxes typically follows this sequence:

Requirement Confirmation → Structural Design → Mold Manufacturing → Mold Assembly → Trial Production of Samples → Sample Revisions (if necessary) → Approval → Mass Production

The lead time depends on the mold’s complexity. Tin boxes with simple geometric shapes typically require less development work than those with complex curved surfaces, embossing techniques, irregular shapes, or multi-part structures. Of course, the client’s preparatory work also affects the schedule. Providing complete dimensional data, reference samples, product specifications, and clear approval feedback reduces the need for repeated structural revisions and shortens the development cycle.

A Reliable Development and Design Process for Custom Food Tins

For custom food tin boxes, the most reliable development process is as follows:

Product Requirements → Custom Sample Sketch → Mold Structural Drawing → 3D Structural Drawing → Wire-Cut Mold → 3D Forming → Mold Assembly → Production Samples → Final Validation → Mass Production

At TSING, this process lets us develop custom molds based on real food and packaging requirements, rather than rigidly applying design concepts to unsuitable standard structures. Efficient mold development ultimately ensures that the produced tin cans feature stable manufacturing processes, proper filling compatibility, and reliable sealing performance.