
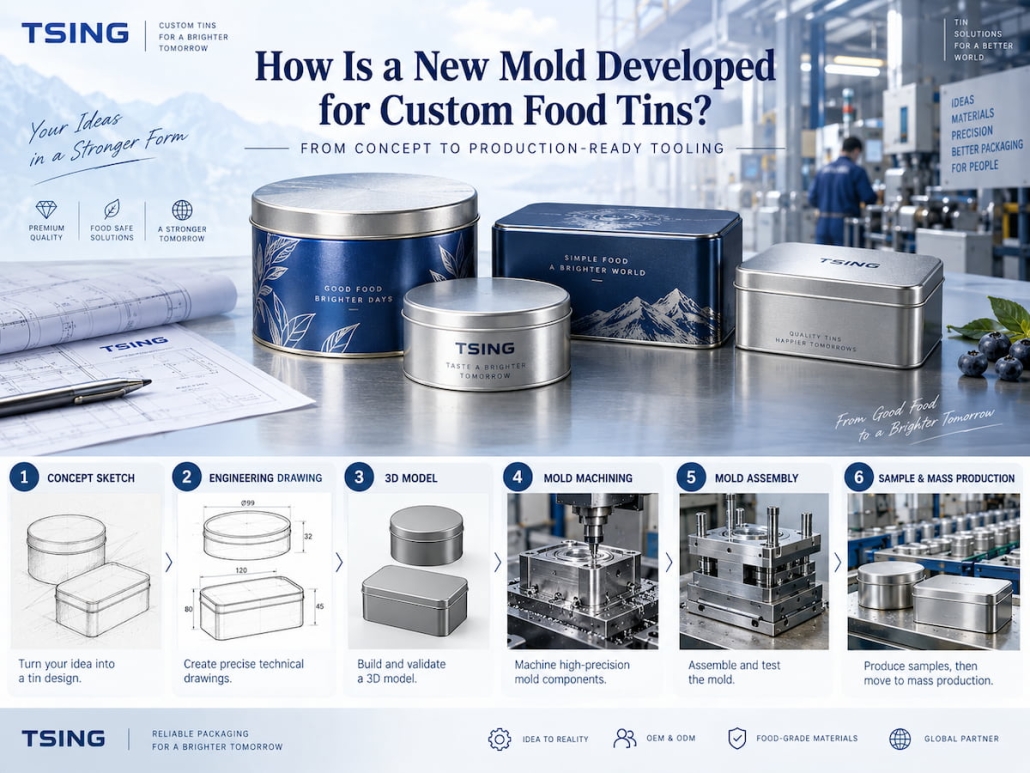
How Is a New Mold Developed for Custom Food Tins?
Developing new molds for custom food tins starts with the product, not the mold-making process. At TSING, we first confirm the tin’s required dimensions, shape, lid structure, intended food use, internal layout, and exterior decorative details. We then translate the approved design concept into seven stages:
Custom Sample Drawing → Mold Structure Drawing → 3D Structural Drawing → Mold Contour Cutting → 3D Surface Forming → Mold Assembly → Pre-Production Prototyping
Before the mold goes into production, each stage verifies different aspects of the design. This systematic process enables TSING to identify issues related to dimensions, forming, sealing, and appearance early on, reducing unnecessary mold modifications and helping clients turn custom packaging concepts into food tins with stable performance ready for mass production.
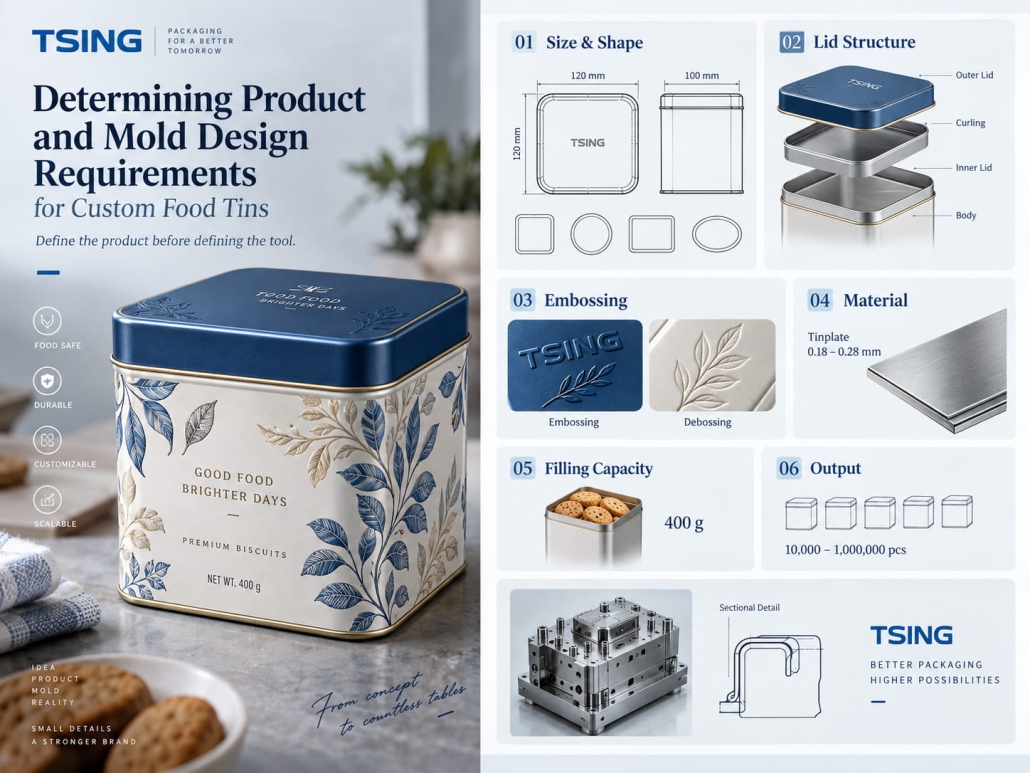
Determining Product and Mold Design Requirements for Custom Food Tins
Before developing a new mold for custom food tins, we must determine whether a new mold is necessary and clearly define the packaging requirements it must meet. Mold development should not begin with machining; it should start with an assessment of the tin’s dimensions, shape, sealing structure, internal product layout, and existing mold resources. Once we clarify these requirements, we can decide whether to modify an existing mold or develop a completely new one. Next steps include gathering accurate product and packaging information, translating relevant requirements into feasible tin mold design solutions, and then moving through the full custom food tin mold development and design process—from creating structural drawings to mold manufacturing and sample validation.
When Is a New Mold Required for Custom Food Tins?
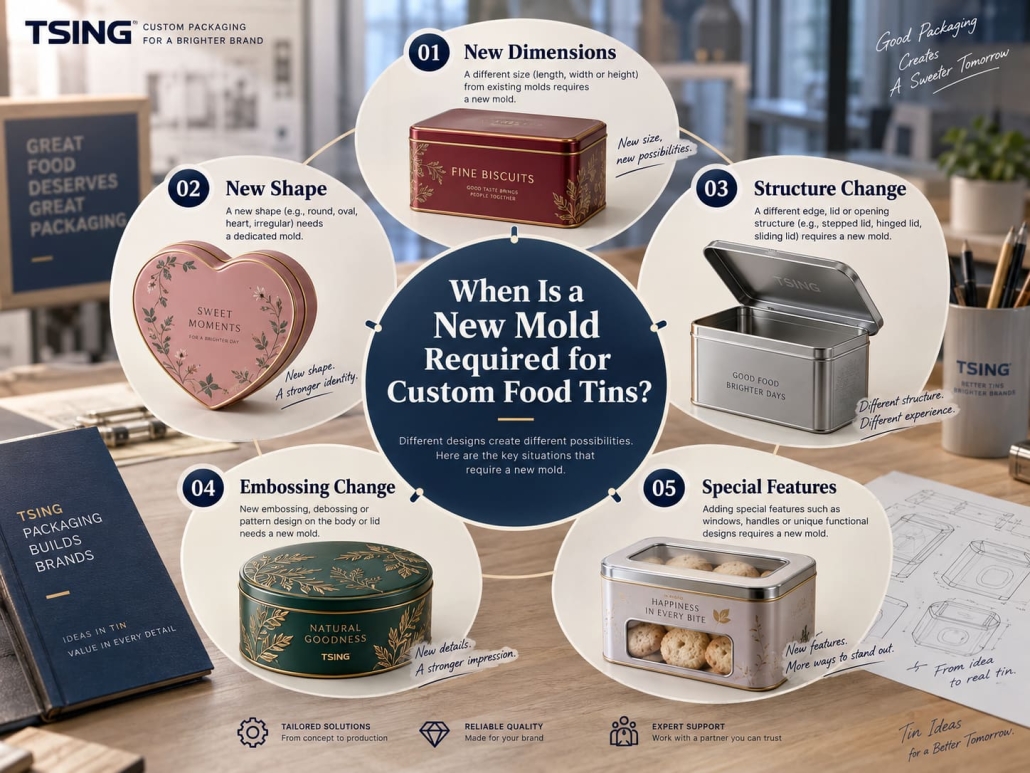
You need a new mold when existing production molds cannot achieve the desired shape, dimensions, structure, or functional details of the tin. For many custom food tin boxes, simply changing the printed design does not require a new mold. If a customer selects a round, rectangular, square, or irregular shape from the mold library, we can typically use the existing structure directly for design and prototyping.
However, if a customer requests structural changes, we must create a new mold. Examples include:
- Completely new dimensions for length, width, height, or diameter
- Unique lid or base contours
- Custom embossing or three-dimensional shapes
- Unique shoulders, curved side walls, rounded corners, or stepped structures
- Closed structures that cannot be produced using existing molds
Therefore, the decision to create a new mold should be based on geometric shapes and forming-process requirements, not solely on whether the packaging appearance is a custom design.
During the mold development and design phase for custom food tins, TSING first compares the customer’s requested packaging specifications with existing molds before recommending a new mold. This helps avoid unnecessary mold costs for the client, especially when existing, proven designs already meet the packaging requirements.
What Information Is Needed Before Developing a Custom Food Tin Mold?
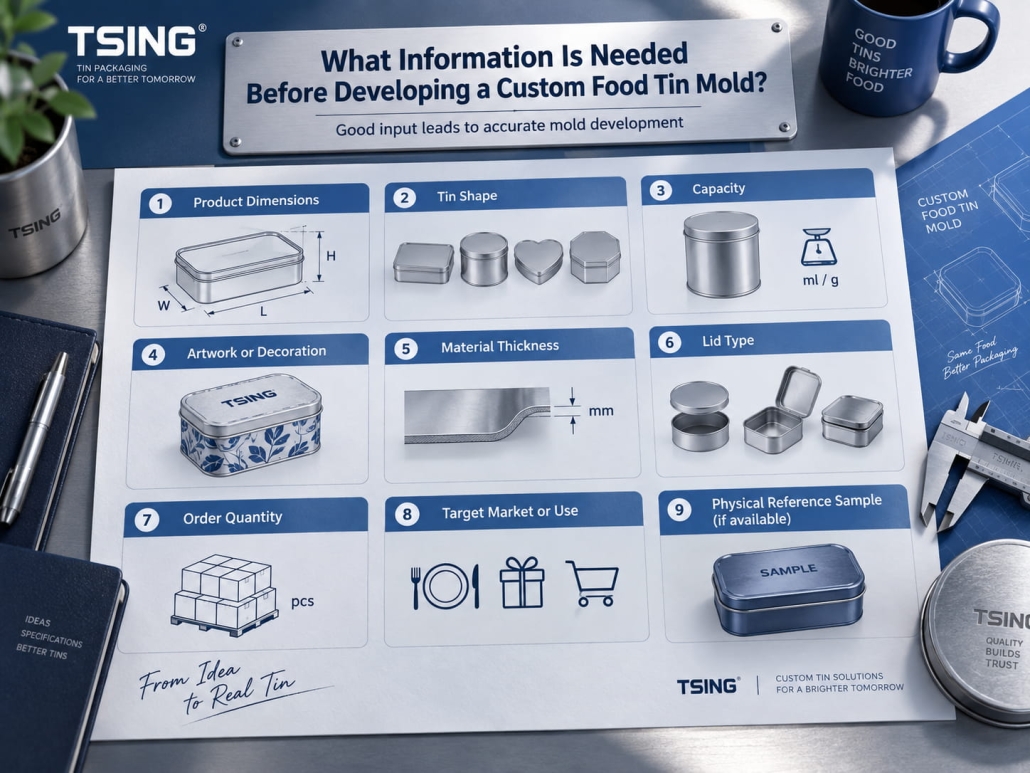
Mold development accuracy depends on the precision of the product information. We cannot begin designing a tin mold based solely on visual reference images.
Before initiating the engineering design process, we typically need to confirm details such as the required dimensions and shape of the finished tin box, as well as the desired lid structure. For food products, the contents themselves often determine the critical dimensions. For example, a cookie tin design must account for the cookies’ diameter, thickness, arrangement, tray layout, and required headspace. Even if tea tins and candy boxes look similar, their opening dimensions or internal volume requirements may differ completely.
Providing images of custom samples is usually the first practical step. This helps us understand the client’s expectations for the tin’s appearance and proportions before detailed engineering design begins.
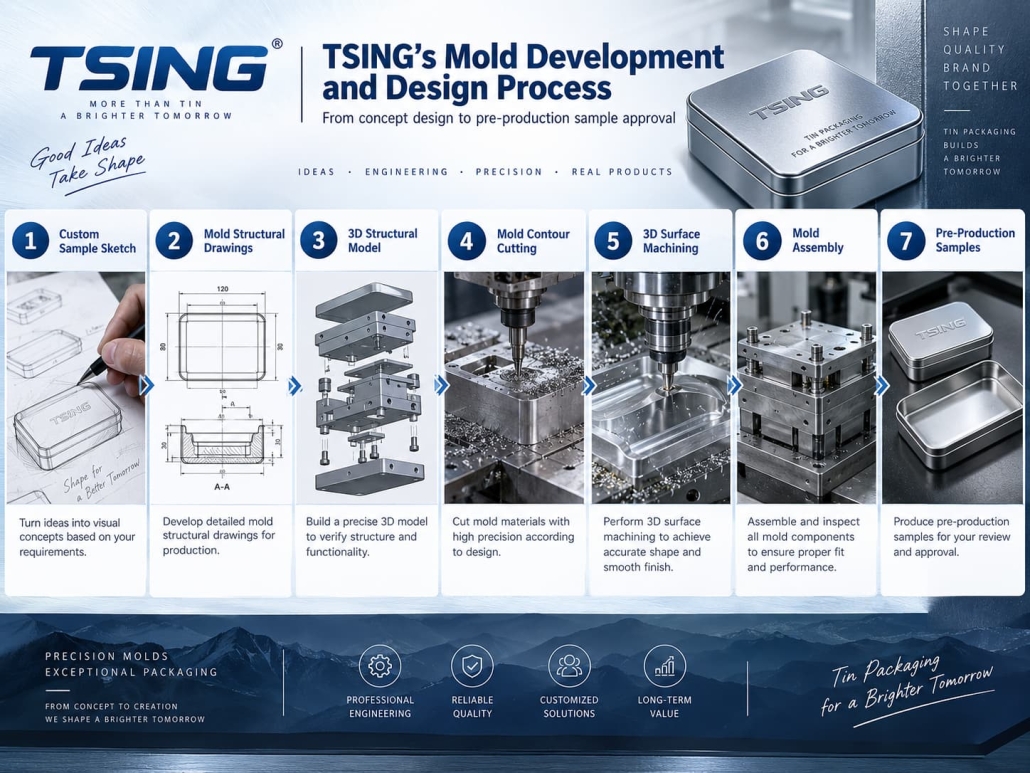
TSING’s Mold Development and Design Process
After confirming the structure and requirements, we follow the process below to develop the mold, rather than proceeding directly to the metal-cutting stage. This process typically consists of seven stages.
1. Custom Sample Sketch:
The project begins with a visual rendering of the desired tin box. This helps confirm the overall shape, proportions, lid style, and key aesthetic features.
2. Mold Structural Drawings:
The visual concept is translated into structural mold drawings. At this stage, TSING evaluates the manufacturing methods for the tin box body, lid, base, edges, and forming areas.
3. 3D Structural Model:
A 3D structural model is then created to evaluate the geometry more precisely. This stage helps identify interference issues, improper proportions, forming limitations, and assembly risks before manufacturing the physical mold.
4. Mold Contour Cutting:
Once the structural design is approved, the mold components are cut according to the engineering specifications. The precision of this stage directly affects the consistency of the finished tin box.
5. 3D Surface Machining:
If the design includes curved surfaces, irregular contours, or three-dimensional features, the mold will be machined accordingly to accurately reproduce these forms.
6. Mold Assembly:
The team assembles and inspects mold components as a complete system. Before trial production, verify alignment, forming positions, and fit between mold components.
7. Pre-Production Samples:
The manufacturer produces physical samples using the assembled mold. Before formal mass production begins, the customer and manufacturer can inspect the actual tin cans.
Newly Developed Molds Must Undergo Validation Before Entering Mass Production
Completing mold fabrication does not mean custom food tins are immediately ready for mass production. Before we use the mold for large-scale manufacturing, we must validate it to ensure the tins meet the specified dimensions, structure, sealing performance, and product-fit requirements. This validation phase is critical because even minor deviations—such as lid fit, inner tray positioning, formed edges, or internal clearances—can cause issues during filling or mass production. Therefore, we use prototype samples to verify both appearance and functional performance and make any necessary adjustments before final approval.
How to Test Prototypes of Custom Food Tins?
Even if a prototype resembles the original design drawings, it does not guarantee approval. We evaluate samples as functional packaging; depending on the design, the prototype review may cover finished dimensions, the fit between the lid and body, and the smoothness of the opening and closing mechanism.
When testing prototypes, we place actual food items or dimensionally accurate substitutes inside the box whenever possible. For example, even if a prototype meets the external drawing requirements, modifications may still be necessary if the inner tray sits too high and prevents the lid from closing properly. Similarly, while the lid may look correct externally, it may turn out too loose or too tight after actual molding.
Therefore, prototype testing closely links the tin mold design with actual packaging performance.
Does Developing a New Mold Affect the Lead Time for Custom Tins?
Developing a new mold increases the initial time investment, as it must undergo multiple engineering design and validation stages before formal production can begin. For projects using existing molds, you can usually move directly to pattern design, prepress preparation, and production prototyping; new mold projects must first complete steps such as structural confirmation, mold drawing preparation, 3D modeling, machining, mold assembly, trial molding, and sample approval.
Therefore, the delivery process for new mold projects involving custom food tin boxes typically follows this sequence:
Requirement Confirmation → Structural Design → Mold Manufacturing → Mold Assembly → Trial Production of Samples → Sample Revisions (if necessary) → Approval → Mass Production
The lead time depends on the mold’s complexity. Tin boxes with simple geometric shapes typically require less development work than those with complex curved surfaces, embossing techniques, irregular shapes, or multi-part structures. Of course, the client’s preparatory work also affects the schedule. Providing complete dimensional data, reference samples, product specifications, and clear approval feedback reduces the need for repeated structural revisions and shortens the development cycle.
A Reliable Development and Design Process for Custom Food Tins
For custom food tin boxes, the most reliable development process is as follows:
Product Requirements → Custom Sample Sketch → Mold Structural Drawing → 3D Structural Drawing → Wire-Cut Mold → 3D Forming → Mold Assembly → Production Samples → Final Validation → Mass Production
At TSING, this process lets us develop custom molds based on real food and packaging requirements, rather than rigidly applying design concepts to unsuitable standard structures. Efficient mold development ultimately ensures that the produced tin cans feature stable manufacturing processes, proper filling compatibility, and reliable sealing performance.
 Facebook
 Twitter
 Linkedin
